Difference between revisions of "MYOB Advanced and Wageloch Onboarding"
From Wageloch Wiki
| Line 10: | Line 10: | ||
[[File:MYOBAD-more-integrations.png]] [[File:MYOBAD-integration-endpoints.png]] | [[File:MYOBAD-more-integrations.png|750px|top]] [[File:MYOBAD-integration-endpoints.png|725px|top]] | ||
| Line 18: | Line 18: | ||
** <b>NOTE:</b> If not visible, click "<b>...</b>" and it should appear. | ** <b>NOTE:</b> If not visible, click "<b>...</b>" and it should appear. | ||
[[File:MYOBAD-default-ep.png]] [[File:MYOBAD-epver-eep.png]] | [[File:MYOBAD-default-ep.png|600px|top]] [[File:MYOBAD-epver-eep.png|700px|top]] | ||
Revision as of 04:40, 10 November 2023
If you use MYOB Advanced and are considering using Wageloch's onboarding tool, there is a very specific setup that needs to be completed.
This process outlines creating the end points in MYOB Advanced that will help employee's onboarding information transfer freely between Wageloch and MYOB Advanced.
Create Initial Endpoint
- Log into MYOB Advanced.
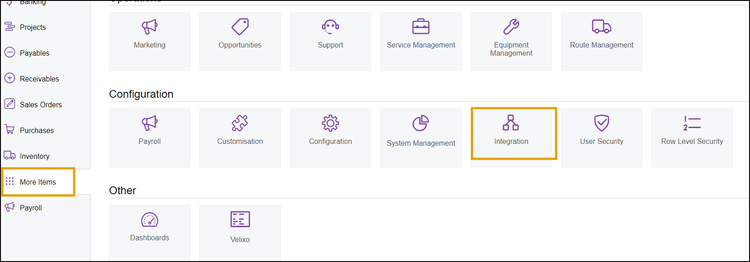
- Select More Items from the left menu and click Integrations.
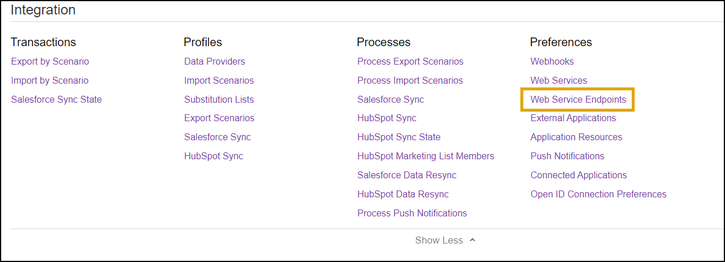
- In the Preferences category, select Web Service Endpoints.
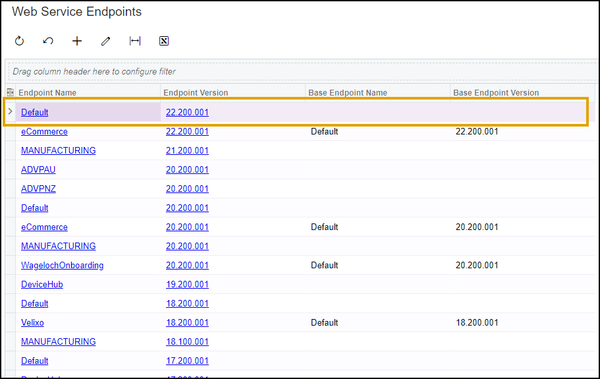
- Select the Default endpoint name (top of the list).
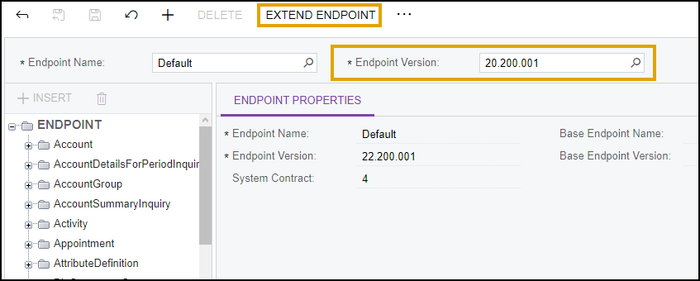
- When opened, confirm that the Endpoint Version is showing as 20.200.001. or update it.
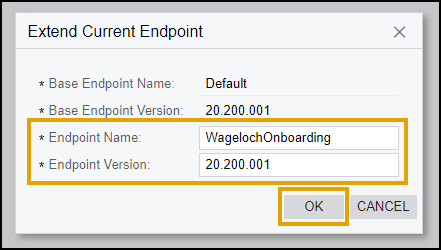
- Above the Endpoint Name field, click Extend Endpoint.
- NOTE: If not visible, click "..." and it should appear.
- A box will appear for Extend Current Endpoint; some fields cannot be edited.
- Base Endpoint Name: Default
- Base Endpoint Version: 20.200.001
- Endpoint Name: WagelochOnboarding (must be exact!)
- Endpoint Version: 20.200.001
- Click OK to finish
