How to Clock In/Out
PIN/Password
Registration
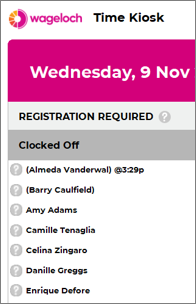
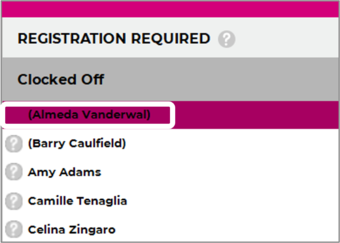
- Click on the your name
- Type a password (eg. Abc123) or a 4-digit PIN (eg. 1234)
- Repeat to confirm the password or PIN
- Registration is now complete; you can now clock in/out!
Clocking In/Out
- Once your password or PIN is registered, the question mark (?) next to your name should disappear.
- Click on your name
- Type your password or PIN
- If clocking is successful, you should receive a Good Morning, Good Afternoon or Goodbye message.
- Please continue with your day!
Fingerprint Scanner
Registration
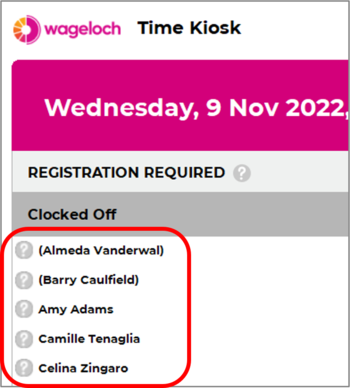
- Click on your name in the list of employees
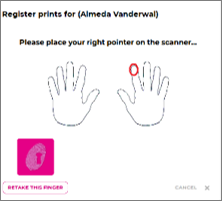
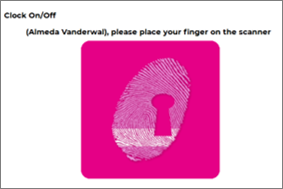
- Press down your finger on the scanner with a little pressure, without rolling.
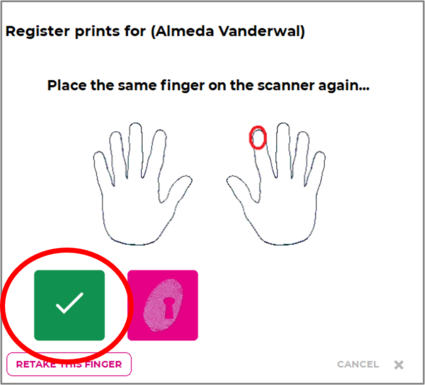
- You should see a green tick appear on the screen as the scanner flashes red.
- Complete this a further 3 times on the same finger
- You'll then be prompted for a different finger
- Complete the process again
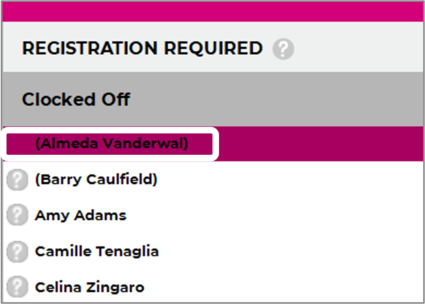
- All done! You have just registered for clocking in/out should no longer have a question mark (?) next to your name.
Clock In/Out
To clock in or out for your shift and/or breaks using the fingerprint scanner:
- Open Wageloch Cloud Time Kiosk
- Find your name on the screen and click it
- Follow the onscreen instructions; make sure to place your finger flat on the pad and press down with a little bit of pressure
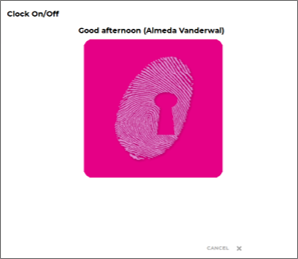
- The scanner should flash red, and a message will pop up to welcome you to your shift or say goodbye!
Facial Recognition (tablet)
Facial Recognition with Name Selection
Registration
- Open Wageloch Time Kiosk app on tablet
- Press on employee name and the front facing camera should appear
- You'll need to fit your face within the frame of the camera; the closer the better
- When you see a yellow frame appear, you need to press Register
- The employee face is now registered and ready for clocking
Clocking In/Out with Name Selection
- Open Wageloch Time Kiosk
- Press on your name
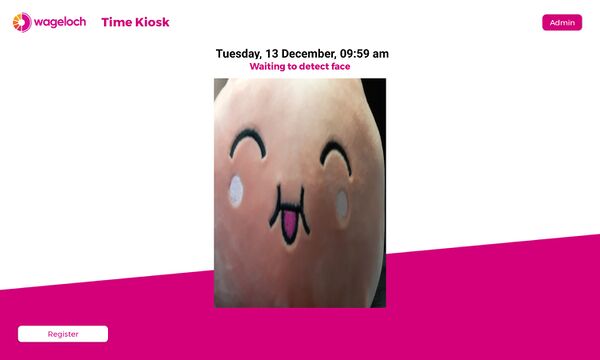
- Fit your face in the frame of the camera; if recognized you'll be clocked in or out
- Your good morning/good afternoon/goodbye message will appear.
Facial Recognition Touchless
Registration
Facial recognition configured as Touchless requires staff to take their facial scan first, then select whose face it is.
- Open Wageloch Time Kiosk app on tablet
- The front facing camera will immediately appear
- You'll need to fit your face within the frame of the camera; the closer the better
- When you see a yellow frame appear, you need to press Register
- Press the employee’s name from the list of available staff
- The employee’s face is now registered and ready for clocking.
Clocking In/Out with Touchless
- Open Wageloch Time Kiosk
- Fit your face in the frame of the camera; if recognized you'll be clocked in or out
- Your good morning/good afternoon/goodbye message will appear.
Mobile Clocking
Getting Access
Download the Mobile App and Login
- Your manager will need to enable you in Wageloch for clocking in/out from your App.
- Download the App via the Google Play Store (Android) or App Store (iOS) by searching for Wageloch Mobile App.
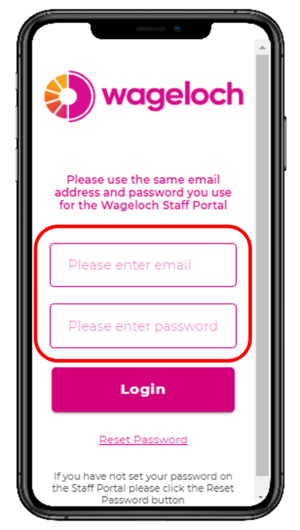
- Once you have downloaded the Wageloch App you can enter the same email address and click Reset Password to set a password.
Please note: If your app store is set to a region that is not Australia or New Zealand, Wageloch Mobile App will not be available for download.
- Open the Wageloch Mobile app.
- For Email Address, enter the same email address you've been receiving your Wageloch emails to.
- For Password, enter your newly created password and press Login.
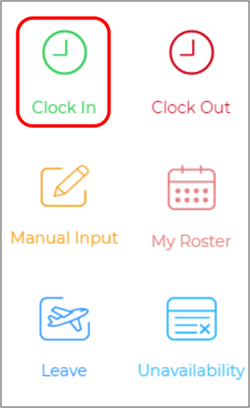
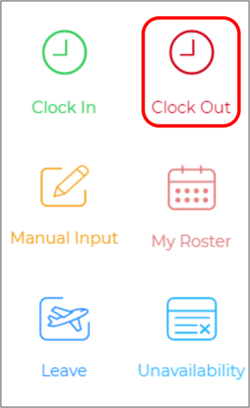
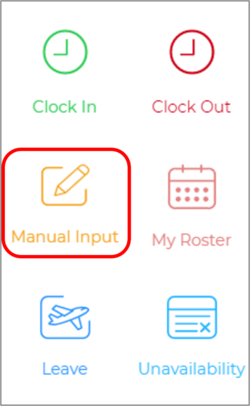
- You should now see options for Clock In, Clock Out and Manual Input.
Clocking In
- Open Wageloch Mobile App.
- Tap Clock In
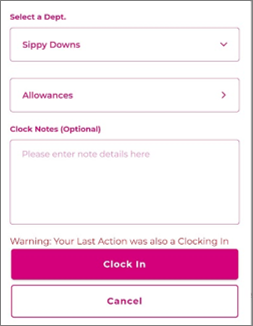
- Depending on the configuration, you could be prompted a few different ways:
- Simply press the Clock In button to clock in.
- Clock Notes (Optional): enter any information for your manager to see before pressing Clock In.
- Selecting any Departments or Roles to specify what you're doing on your shift.
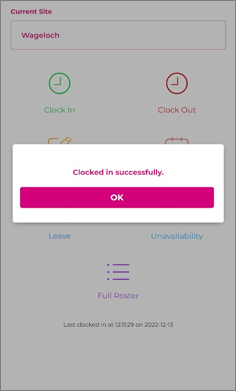
- If you've clocked in successfully, you'll receive a prompt saying Clocked in successfully.
Clocking Out
- Open Wageloch Mobile App.
- Tap Clock Out
- Depending on the configuration, you could be prompted a few different ways:
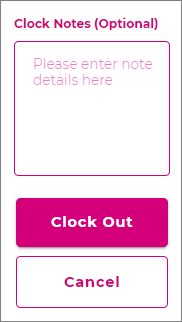
- Simply press the Clock Out button to clock out.
- Clock Notes (Optional): enter any information for your manager to see before pressing Clock Out.
- Selecting any Departments or Roles to specify what you've done during your shift.
- If you've clocked out successfully, you'll receive a prompt saying Clocked Out successfully.
Logging Manual Times
Manual times are enabled/disabled as per the business manager's request when configuring the Wageloch Mobile App for clocking.
This tool is primarily used if a staff member is out of signal (data, wifi, GPS, all of the above) or backdating their clock times if they've forgotten to clock in/out for shifts.
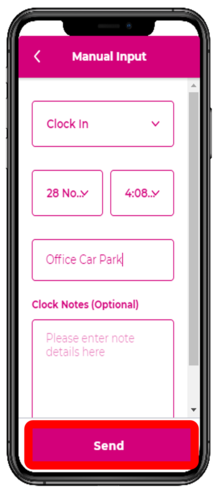
- Open Wageloch Mobile App.
- Tap Manual Input.
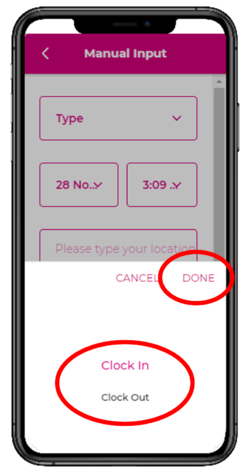
- Select whether this will be a Clock In or Clock Out time from the first drop menu.
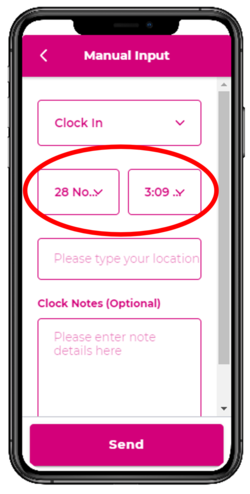
- Pick the correct date and time the clock time is to be logged for.
- Enter your locations at the time of clocking (i.e. office carpark, Job 3562, etc.)
- Enter any notes or information your employer may need.
- Press Send to log your manual time.
Iris Scanner
Registration
- Please make sure that your computer and Iris Scanner are in a well-lit area - not having enough light can cause issues with registration and clocking in/out later.
- Click on the staff member’s name
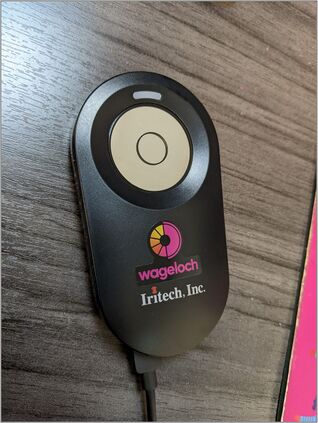
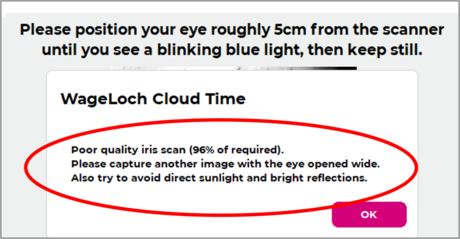
- Hold the Iris Scanner about 10cm away from the eye, looking in the circle on the surface of the scanner with your eye wide open
- A preview will be displayed on the Time Kiosk screen; this will highlight yellow if trying to scan
- If the scan has failed, the system will let you know to hold the scanner closer to the face or improve lighting
- If successful, you should see the “?” disappear from next to the staff name
- You can now clock in/out!
Clock In/Out
- Click on your name
- Hold the iris scanner about 10cm away from your eye and make sure your eye is wide open
- This will say good morning, good afternoon or goodbye if the scan is successful.
RFID Tag
Registration
- Your manager will assign you an RFID fob tag or card - Keep it safe!
- In Wageloch Time Kiosk, click on your name to register.
- Swipe the ID tag over the scanner; you should hear a beep if successful as well as a notification on the screen.
- This should complete registration, you should no longer have a question mark ? next to your name.
Clock In/Out
- Wageloch Time Kiosk must be open.
- When you start or end your shift, they just need to swipe the ID tag over the reader.
- This will beep and display a good morning, good afternoon or goodbye message on the screen.
- You can now go on with their day.
Facial Recognition (Hanvon Unit)
Registration
- Registration is completed on the Hanvon unit itself - your manager may need to be present to help register.
Clock In/Out
- To clock in/out for your shift, please stand in front of the Hanvon unit.
- Your face should appear on the display screen and show a tick when successful.
- Continue on with your day!
Problems Clocking In/Out?
If you're experiencing any issues with registration or clocking in/out on any of the listed clocking options above, it's best to speak with your manager.
They can provide other clocking options if necessary, reset your registration or troubleshoot with our Helpdesk further.
