Difference between revisions of "Leave Templates"
From Wageloch Wiki
| Line 58: | Line 58: | ||
==Creating the Template== | ==Creating the Template== | ||
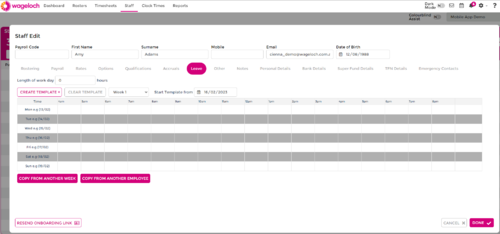
[[File: NEW-INDI-TEMP.PNG|500px|thumb|right|Full view of Individual Template]] | [[File: NEW-INDI-TEMP.PNG|500px|thumb|right|Full view of Individual Template]] | ||
<b>Please note:</b> The Roster Leave Template must be disabled for this to work. | |||
* Click on Staff in the top left menu. | * Click on Staff in the top left menu. | ||
Revision as of 04:23, 16 February 2023
Creating leave templates in Wageloch has the benefit of making leave booking easier in the long run, especially if your staff don’t typically work a standard eight-hour shift. This document will outline:
- Creating roster leave templates for all applicable staff entitled to leave
- Same format as a roster
- Includes all employee’s standard hours in bulk
- Can be set in rotations
- Individual leave templates
- Configure leave templates for each employee one at a time
- Only include normal shifts
Roster Leave Template
Enabling the Template
- Open Wageloch and sign in.
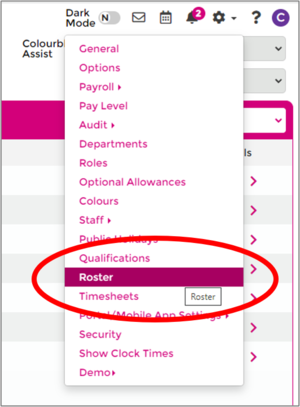
- Click on the Settings cog in the top right
- Select Rosters from the menu.
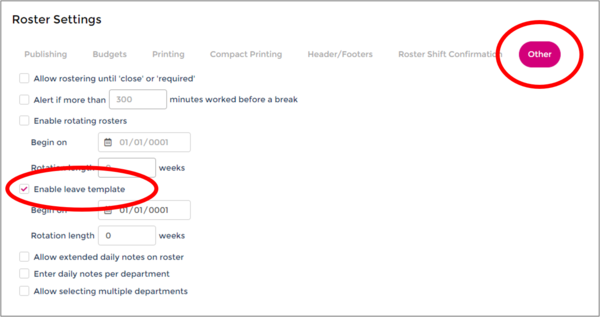
- In the Other section, tick Enable Leave Template.
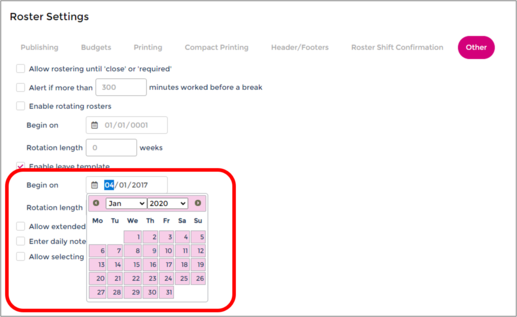
- Pick date when the template will commence (can backdate if needed)
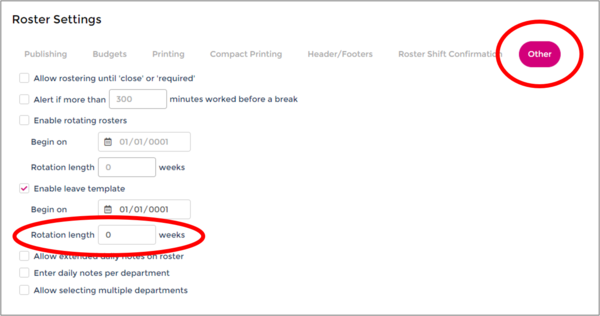
- Select how long the template will be for (1 week/fortnight, etc.)
- Done to save.
Creating the Template
- After enabling the template, click on Rosters in the top left menu.
- In the top right corner in the Rosters drop menu, select Leave Template.
- Select the week/fortnight in question; this relies on your normal roster cycle.
- You’ll notice this is the same formatting as a roster, however there are only days, no dates.
- This will ignore roster tools like leave and unavailability.
- You can create your leave template in a few different ways:
- From blank, adding in shifts/staff as you go on the daily mode.
- From blank, switching to Roster by Staff Member to do one person at a time.
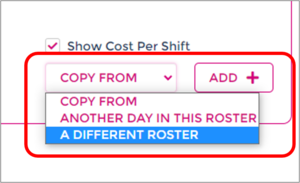
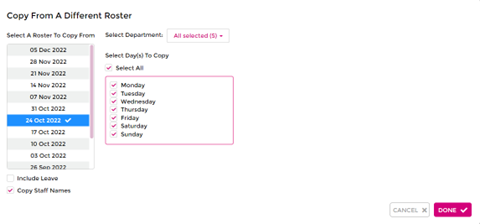
- Use the Copy From tool in the bottom right to copy from a previous roster or another template.
- Once you’ve added in shifts for all the staff eligible for leave, click Save.
- Your Roster Template is now ready to use!
Individual Leave Template
Creating the Template
Please note: The Roster Leave Template must be disabled for this to work.
- Click on Staff in the top left menu.
- Select the name of the employee you wish to add the template for.
- Select the Leave category on the staff card.
- Here you can configure the individual leave template in a few different ways:
- Set default length of work day to __ hours
- Create multiple templates for multiple weeks
- Manually add in their shifts if they vary day to day and hours in the shift.
- Be sure to set a date to Start Template from.
- Done to save.
Applying the Leave Template
Portal/Mobile App Requests
- Open Wageloch and sign in
- Click the Leave Calendar icon in the top right.
- Under the Pending Requests category, you should have a pending request.
- Click on the name of the employee.
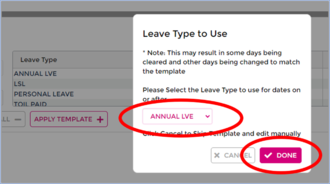
- When viewing their request, it will automatically appear with a prompt to apply a leave
template.
- Select the leave type you wish to use and click Done to apply.
- Click Save to approve the leave request.
Manual Leave Bookings
- Open Wageloch and sign in
- Click the Leave Calendar icon in the top right.
- Select Calendar from the menu categories.
- Click/drag across the day you wish to book.
- Select the employee name from the list.
- You should see a button Apply Leave Template; click it.
- Select the leave type you wish to use and click Done to apply.
- Click Save to approve the leave request.
