Difference between revisions of "Rotation Templates"
| Line 66: | Line 66: | ||
<Br><br> | <Br><br> | ||
[[File:Create-from-rotation (1).png]] [[File:Roster-from-rotate (1).png|490px]] | [[File:Create-from-rotation (1).png]] [[File:Roster-from-rotate (1).png|490px]] | ||
<br> | |||
<br> | |||
<b>[[Creating Rosters | < Back]]</b> | |||
Revision as of 06:36, 11 May 2023
Rotation templates are slightly more complex than your normal Templates as they rely on the start date of the rotation to be set correctly. If set right, creating rosters from rotations needs only a date to know which week/fortnight you're in and which staff are visible in the roster.
This tool is useful if you have multiple weeks of shifts or people that rotate through, such as:
- 3 week rotation.
- 15 employees scheduled each period, Monday to Friday hours only.
- 3 Teams with 5 staff allocated to each: Team A, B, C.
- Shift times are a set schedule for morning (4AM - 12PM), afternoon (10AM - 6PM) and night (5PM - 12AM)
- Rotation Week 1: Team A - Morning, Team B - Afternoon, Team C - Night
- Rotation Week 2: Team A - Afternoon, Team B - Night, Team C - Morning
- Rotation Week 3: Team A - Night, Team B - Morning, Team C - Afternoon.
In this article we'll be walking through how to enable rotation templates, where to create the rotations and how to create your rosters once they're setup up.
If you have any questions or require assistance with your rotation templates, please don't hesitate to contact our Helpdesk.
Enabling Rotations
To enable rotation templates, you need to know the following information to ensure your data will be correct:
- Which date week 1 in your rotation commences.
- How many weeks/fortnights your rotation must go through before returning to week 1.
- The staff/shifts who will be entered into the templates
With the information above, complete the steps below:
- Open Wageloch and sign in.
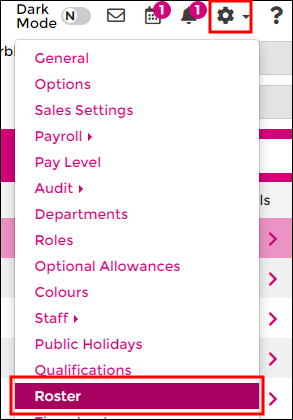
- Click on the Settings cog (top right corner) and select Rosters from the menu.
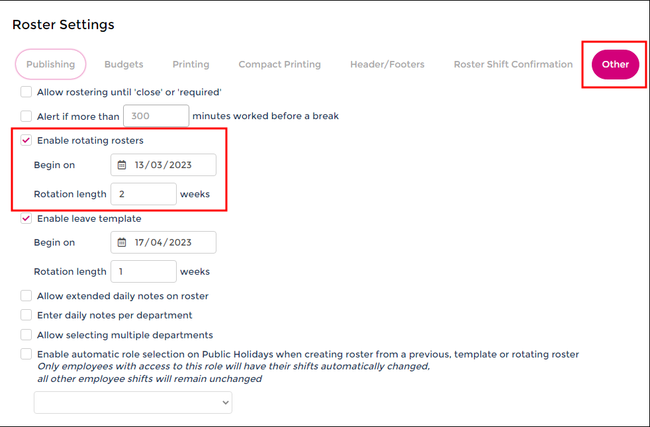
- With the Roster Settings menu open, select the Other category.
- Tick the box to Enable rotating roster
- Enter the date week 1 will begin.
- Enter how many weeks/fortnights your rotation length will last for before resetting.
- NOTE: If you roster fortnightly and are on a 5 week rotation, you would need to set the rotation length to 5 fortnights.
- Click Done in the bottom right corner to save.
Creating Rotation Templates
- Once your rotation template has been enabled, click Rosters from the top left to return to the home screen.
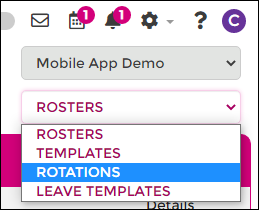
- In the Rosters drop menu (top right), select Rotations from the menu.
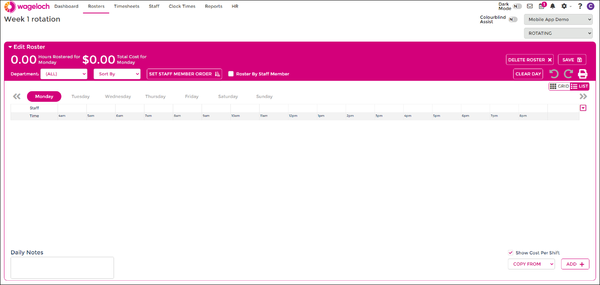
- You'll now be presented with multiple weeks/fortnights to create rotations in.
- Starting with week/fortnight 1, add in your shifts and/or staff; ideally the things that are static and not change.
- NOTE: This step is the same as creating a standard roster
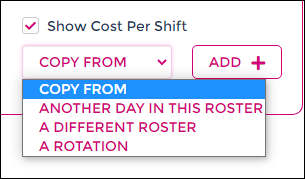
- TIP: You can use the Copy From tool in the bottom right to copy from an existing roster or roster template.
- Make sure to save as you go.
- Complete this for each of the individual rotation templates.
Creating a Roster from Rotations
- Return to your home screen by click Rosters in the top left menu.
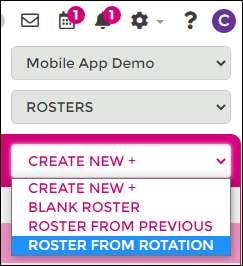
- Click Create New >> From Rotation
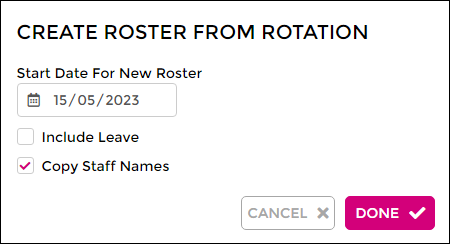
- Select the date your roster will start; the date selected will determine which week/fortnight the rotation will be copied from.
- To copy names and shifts into the roster, keep the Copy Staff Names box ticked. Unticking this option will copy shifts only.
- Click Done to create your roster.
If your rotation dates and template has been created correctly, you should now have a roster with dates, staff and shift times!
You're still able to make modifications within your roster, and these changes will not affect your rotation templates.
