Difference between revisions of "Facial Recognition (tablet)"
From Wageloch Wiki
| Line 28: | Line 28: | ||
* You'll need to fit your face within the frame of the camera; the closer the better | * You'll need to fit your face within the frame of the camera; the closer the better | ||
* When you see a yellow frame appear, you need to press Register | * When you see a yellow frame appear, you need to press Register | ||
* The employee face is now registered and ready for clocking <br> | * The employee face is now registered and ready for clocking | ||
<br> | |||
===Clocking In/Out with Name Selection=== | ===Clocking In/Out with Name Selection=== | ||
* Open Wageloch Time Kiosk | * Open Wageloch Time Kiosk | ||
| Line 35: | Line 35: | ||
* Fit your face in the frame of the camera; if recognized you'll be clocked in or out | * Fit your face in the frame of the camera; if recognized you'll be clocked in or out | ||
* Your good morning/good afternoon/goodbye message will appear. | * Your good morning/good afternoon/goodbye message will appear. | ||
<br> | <br> | ||
==Facial Recognition Touchless== | ==Facial Recognition Touchless== | ||
Revision as of 02:48, 15 February 2023
Tablet Installation
Note: When setting up a brand new tablet out of the box, you'll need to complete the device setup first before completing any of these steps. Give yourself plenty of time!
- Power on your iPad or Android tablet.
- Ensure that the device is connected to the internet and power - this will always be required to ensure times are being relayed.
- Go into the app store (Apple: App Store, Android: Google Play Store) and download Wageloch Time Kiosk.
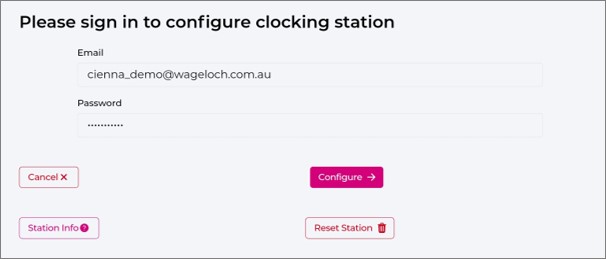
- Once downloaded, you'll be prompted to log in with your Wageloch management credentials; press Configure.
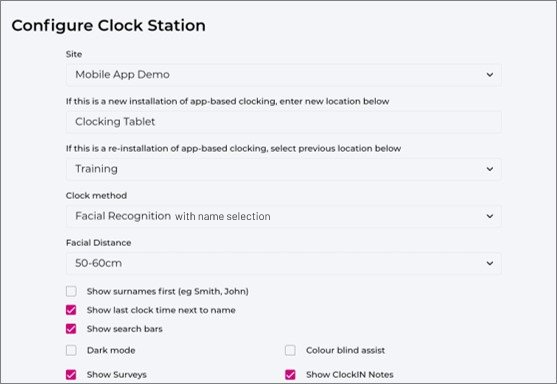
- You'll be presented with a series of options - follow the explanation below to get the best out of your setup.
Configuration
- Site: This should display the name of the business, or give you options to select others (if available).
- Add New Location: Identify the name of the device, i.e. Clocking Tablet, Warehouse, Kitchen, etc.
- Clock Method: Select either Facial Recognition with Name Selection or Facial Recognition Touchless (we'll be discussing the configuration for each further down)
- Facial Distance: Select the distance for how far staff will be standing away from the device when clocking in/out.
- Click Save to finish your configuration setup.
Facial Recognition with Name Selection
Registration
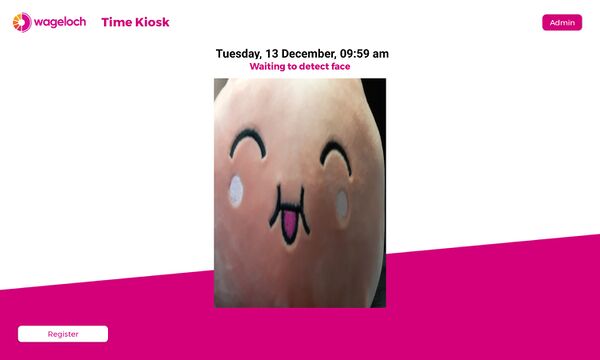
- Open Wageloch Time Kiosk app on tablet
- Press on employee name and the front facing camera should appear
- You'll need to fit your face within the frame of the camera; the closer the better
- When you see a yellow frame appear, you need to press Register
- The employee face is now registered and ready for clocking
Clocking In/Out with Name Selection
- Open Wageloch Time Kiosk
- Press on your name
- Fit your face in the frame of the camera; if recognized you'll be clocked in or out
- Your good morning/good afternoon/goodbye message will appear.
Facial Recognition Touchless
Registration
Facial recognition configured as Touchless requires staff to take their facial scan first, then select whose face it is.
- Open Wageloch Time Kiosk app on tablet
- The front facing camera will immediately appear
- You'll need to fit your face within the frame of the camera; the closer the better
- When you see a yellow frame appear, you need to press Register
- Press the employee’s name from the list of available staff
- The employee’s face is now registered and ready for clocking.
Clocking In/Out with Touchless
- Open Wageloch Time Kiosk
- Fit your face in the frame of the camera; if recognized you'll be clocked in or out
- Your good morning/good afternoon/goodbye message will appear.
Deleting Face Scans
- Open Wageloch Time Kiosk
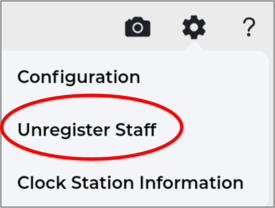
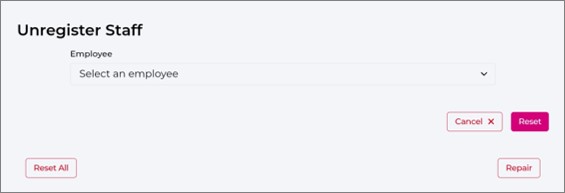
- Press the Settings cog in the top right and select Unregister Staff
- Select the person you wish to unregister, and press Reset
- You can now re-register the staff member's face
