Difference between revisions of "Installing Wageloch"
From Wageloch Wiki
| Line 7: | Line 7: | ||
* Ensure that the device is connected to the internet and power - this will always be required to ensure times are being relayed. | * Ensure that the device is connected to the internet and power - this will always be required to ensure times are being relayed. | ||
==Download Time Kiosk App== | ===Download Time Kiosk App=== | ||
* Go into the app store <i>(Apple: App Store, Android: Google Play Store)</i> and download <b>Wageloch Time Kiosk.</b> | * Go into the app store <i>(Apple: App Store, Android: Google Play Store)</i> and download <b>Wageloch Time Kiosk.</b> | ||
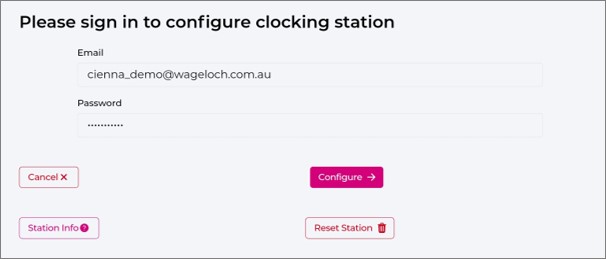
* Once downloaded, you'll be prompted to log in with your Wageloch management credentials; press <b>Configure.</b> | * Once downloaded, you'll be prompted to log in with your Wageloch management credentials; press <b>Configure.</b> | ||
| Line 14: | Line 14: | ||
[[File: 3.0 Admin Credentials & Configure.jpg]] | [[File: 3.0 Admin Credentials & Configure.jpg]] | ||
==Configuration== | ===Configuration=== | ||
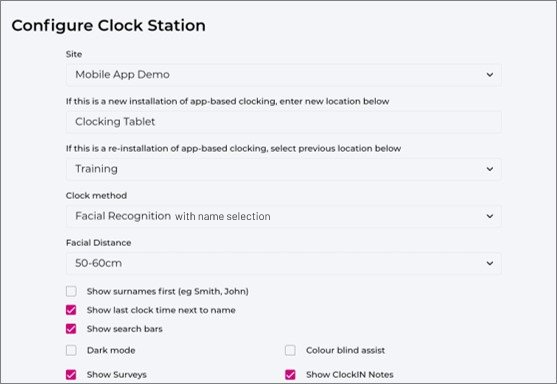
* <b>Site:</b> This should display the name of the business, or give you options to select others <i>(if available)</i>.<br> | * <b>Site:</b> This should display the name of the business, or give you options to select others <i>(if available)</i>.<br> | ||
* <b>Add New Location:</b> Identify the name of the device, <i>i.e. Clocking Tablet, Warehouse, Kitchen, etc.</i><br> | * <b>Add New Location:</b> Identify the name of the device, <i>i.e. Clocking Tablet, Warehouse, Kitchen, etc.</i><br> | ||
Revision as of 05:52, 4 December 2024
List of Clocking Methods by Device/Type
Tablet Installation
Note: When setting up a brand new tablet out of the box, you'll need to complete the device setup first before completing any of these steps. Give yourself plenty of time!
- Power on your iPad or Android tablet.
- Ensure that the device is connected to the internet and power - this will always be required to ensure times are being relayed.
Download Time Kiosk App
- Go into the app store (Apple: App Store, Android: Google Play Store) and download Wageloch Time Kiosk.
- Once downloaded, you'll be prompted to log in with your Wageloch management credentials; press Configure.
- You'll be presented with a series of options - follow the explanation below to get the best out of your setup.
Configuration
- Site: This should display the name of the business, or give you options to select others (if available).
- Add New Location: Identify the name of the device, i.e. Clocking Tablet, Warehouse, Kitchen, etc.
- Clock Method: After viewing the clocking methods available on your tablet further down, select the method you wish to use.
- If using Facial Recognition: Facial Distance is to select the distance for how far staff will be standing away from the device when clocking in/out.
- Click Save to finish your configuration setup.
Download Time Kiosk Installer for Desktop
With recent updates to the Wageloch system, desktop installs of the software are only required if you are using any biometric clocking methods, or you have requested the software to be installed. As there are different Clocking Methods to pick from, our implementation specialists will discuss your options during the Integration Timeline.
If you get stuck at any point during this process, please don't hesitate to contact Wageloch Helpdesk.
Download and Run Installer
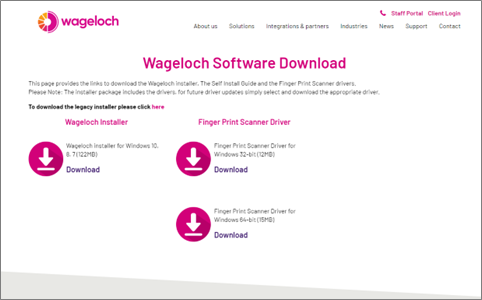
- Visit https://wageloch.com.au/cloud
- Click on the Installer package to download the required files.
- Once completed, open the file and run it.
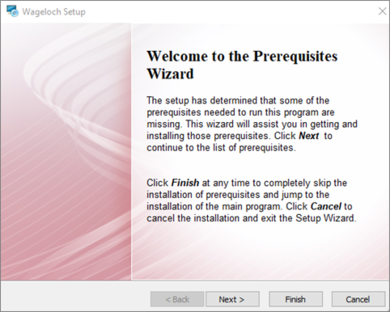
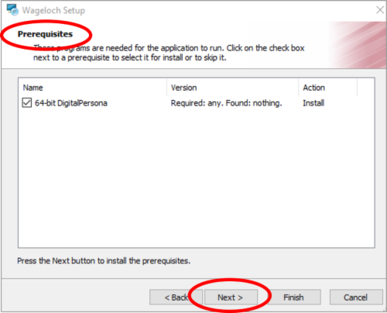
- If you're going to be using a fingerprint scanner, you'll need to install the Digital Persona driver files in the prerequisite page.
- Click Next to install the driver software
- If you are not using a fingerprint scanner, untick the Digital Persona file and click Finish.
- Click Next (this screen will not appear if you select Finish)
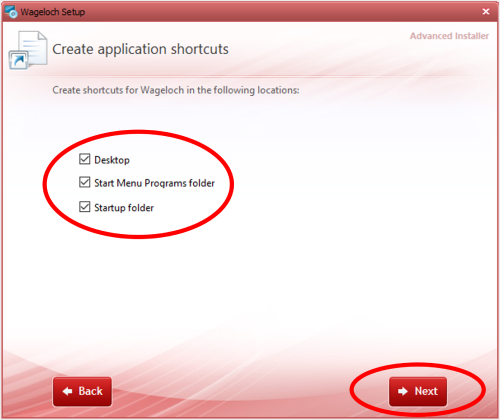
- The installer package will want to create application shortcuts:
- Desktop – Creates shortcut on the desktop
- Start Menu Programs Folder – Adds a shortcut to the Start Menu
- Startup Folder – Wageloch Time Kiosk will open when logging into computer
- Click Next
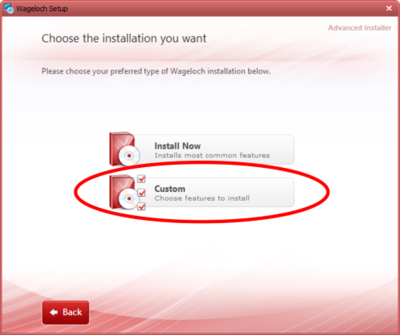
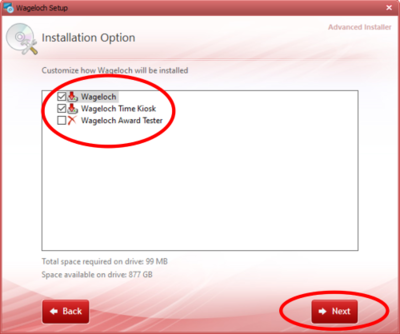
- Select Custom Installation
- Select the installation options as below:
- Wageloch – This option will be used for Rosters and Timesheets
- Wageloch Time Kiosk – This option will be used for Staff Clocking
- Wageloch Award Tester - Not required.
- Click Next
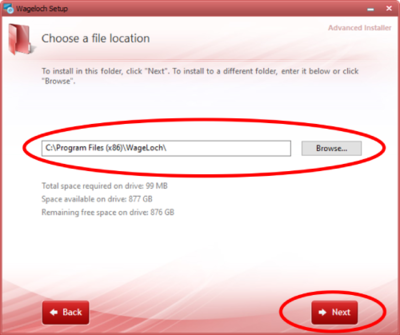
- Choose a File Location
- Click Next
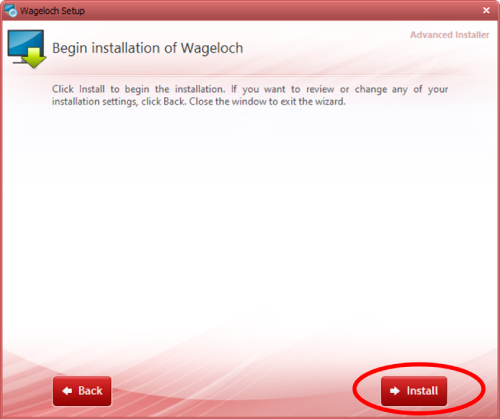
- Click Install; the Installer will run.
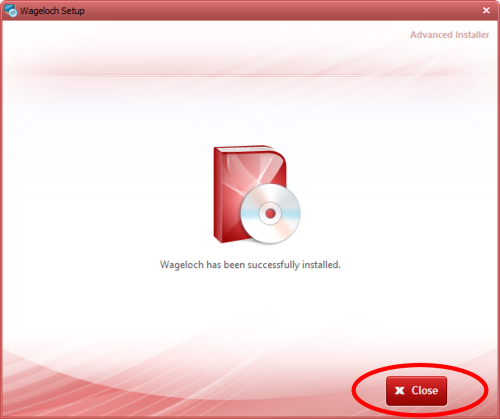
- Once complete, it will state the installation was successful.
- You can now close the window.
Enter Credentials
- Wageloch (admin functions) and Wageloch Time Kiosk (clocking) will now be visible on your desktop.
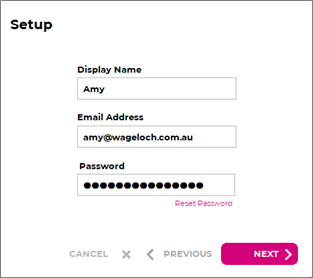
- Open either of the programs for the first time and you'll be prompted for your admin credentials.
- Enter your email address and password, then click Next.
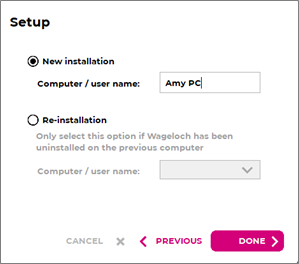
- Identify the name of the computer (DISPENSE, ADMIN PC, JIM BOB HOME, etc.)
- Click Done to finish the installation.
- The program you selected will now open.
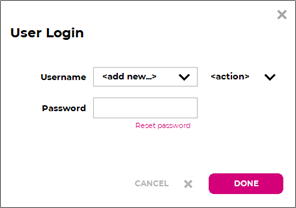
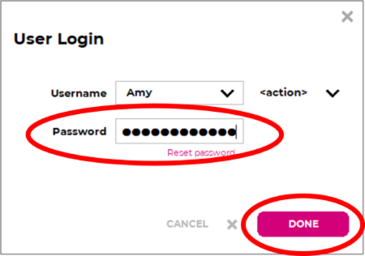
- If you've opened Wageloch (rostering) you'll be prompted to add a new user (steps below).
- If you've opened Time Kiosk, you'll be prompted for your clocking method.
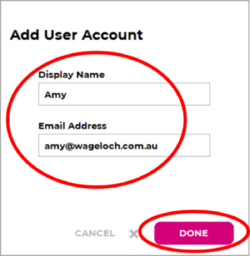
- Create Display Name and enter your login email address
- Click Done
- You'll now be able to enter your password to log in.
