Difference between revisions of "Policies"
From Wageloch Wiki
| Line 8: | Line 8: | ||
* Click Upload Policy in the top right. | * Click Upload Policy in the top right. | ||
** NOTE: This will only accept PDF documents. | ** NOTE: This will only accept PDF documents. | ||
<br> | |||
* Select your policy document by drag and drop or choosing a file. | * Select your policy document by drag and drop or choosing a file. | ||
* <b>File Name: </b> Allows you to change the name of the policy. | * <b>File Name: </b> Allows you to change the name of the policy. | ||
| Line 13: | Line 14: | ||
* <b>Placeholders: </b> Using the preview window on the right, left-click and drag the placeholder names into the window, placing them where that piece of data will populate. | * <b>Placeholders: </b> Using the preview window on the right, left-click and drag the placeholder names into the window, placing them where that piece of data will populate. | ||
* Click Done to save your policy template. | * Click Done to save your policy template. | ||
<br> | |||
[[File:upload-policy.png|1000px]] | |||
[[File: policy-upload-placeholder.png|1000px]] | |||
[[File: policy-upload-placeholder.png]] | |||
==Issuing Policies== | ==Issuing Policies== | ||
Revision as of 01:48, 23 June 2023
Adding Policy documents into Wageloch as part of your onboarding flow is extremely easy to do and is very similar to adding a [Link=Contract Templates| contract template].
The file type import is again limited to PDF files with the policy template having minimal default placeholders available, with only Employee Signature and Supervisor Countersign available.
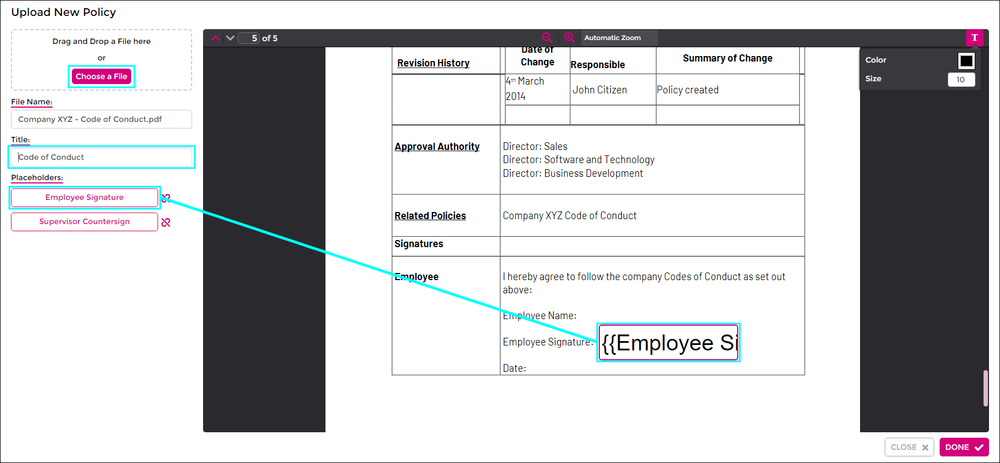
Upload Policy Template
- Select HR from the top menu
- Select the Policies tab.
- Click Upload Policy in the top right.
- NOTE: This will only accept PDF documents.
- Select your policy document by drag and drop or choosing a file.
- File Name: Allows you to change the name of the policy.
- Title: Give the policy a title.
- Placeholders: Using the preview window on the right, left-click and drag the placeholder names into the window, placing them where that piece of data will populate.
- Click Done to save your policy template.
Issuing Policies
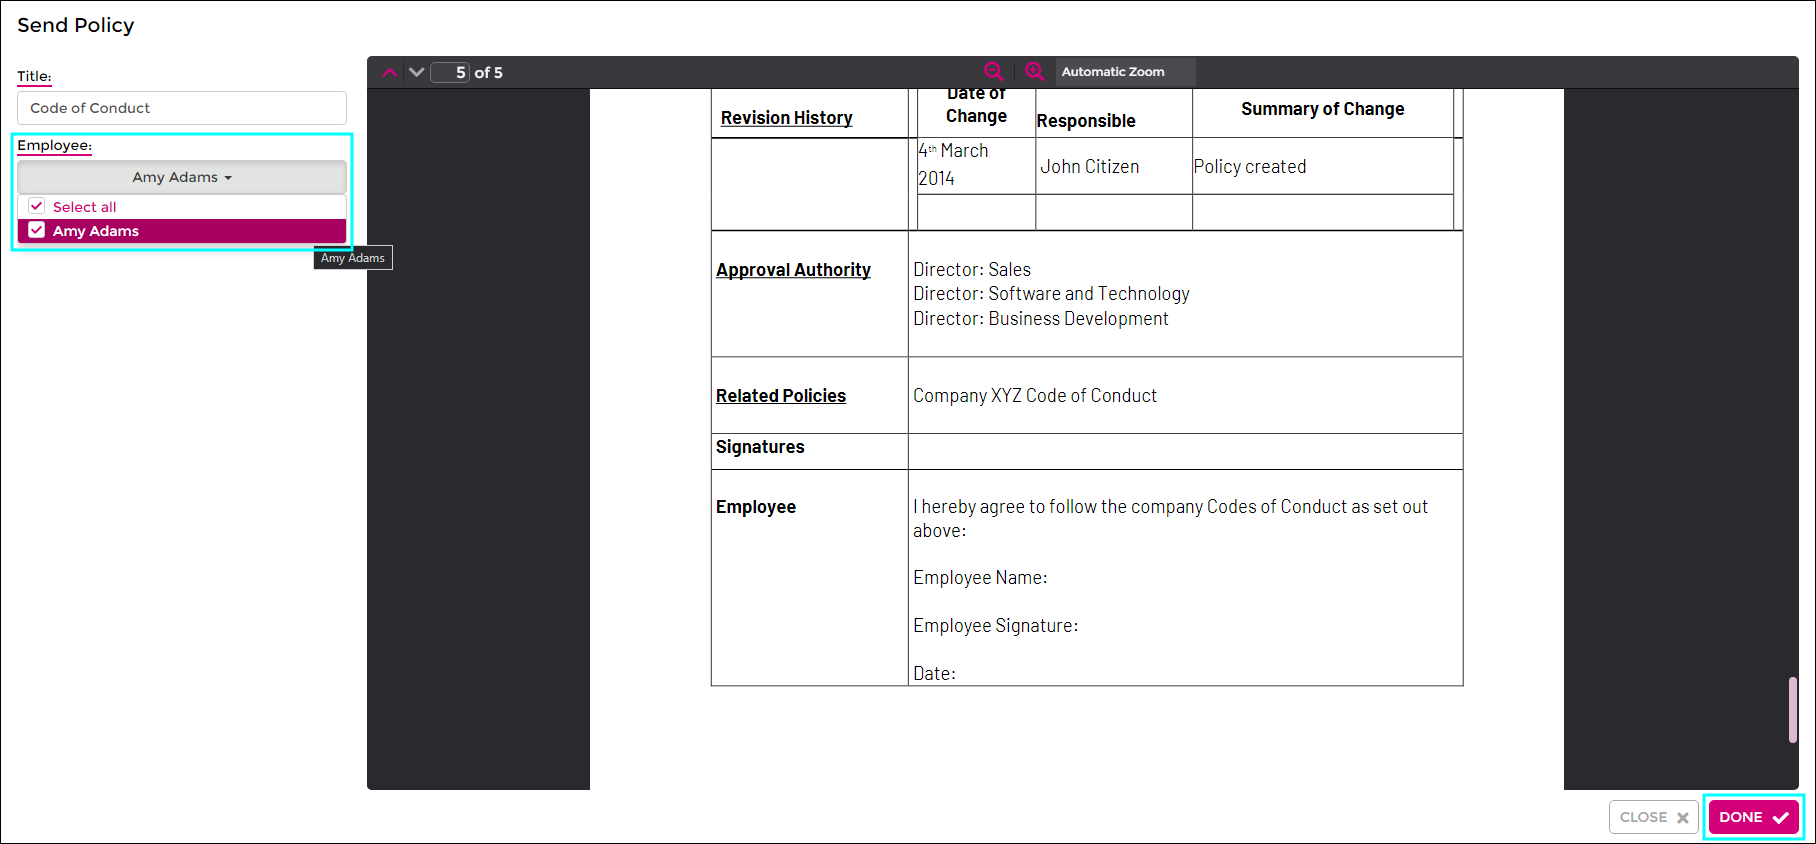
- Open the HR Module
- Click the Policies tab.
- On the left side, click the Page/Pencil Icon to Issue Policy to Employee
- TIP: If you hover over the icons it will show a tool tip with the action.
- Title: Name of the file
- Employee: Select the name of the staff member you wish to send this to
- Place holders: Fill out each of the placeholders and click Done.
- If you added a Countersign field on the template, you’ll be prompted to enter the details of who will be countersigning this policy.
- Click Yes to send to both the employee and countersign.
Edit Policy Template
 To edit any placeholders or information within a policy template, click the pencil icon on the far left.
This will allow you to add, move and remove placeholders, rename the document title, or even upload a new document template if required.
Delete Policy Template
- To delete a policy template, click the bin icon.
- Confirm the deletion prompt.
Even if you delete or edit a policy template, the document will still remain as-is on an employee staff card.


