Difference between revisions of "Creating Rosters"
| Line 60: | Line 60: | ||
[[File:Publishing-roster.gif]] | [[File:Publishing-roster.gif]] | ||
Revision as of 02:50, 20 February 2023
Using Rosters
One of Wageloch's core tools is our rostering system which can assist in managing your business and team better.
When you've completed your rosters you have the ability to print, publish to the Wageloch Mobile App or email the information to your staff, letting them know in advance when they're working in the coming weeks.
What other benefits does rostering have?
- Future forecasting of costs based on your award and the times scheduled.
- Ensuring staff levels are appropriate for the work day/week.
- Knowing who is working and when.
- Depending on your timesheet method, rosters can pre-populate your timesheet to save time!
- ... and so much more!
If you're not already using your rosters or would like to find out more of how rosters can help your business, please don't hesitate to contact the Wageloch Helpdesk for more information.
Basic Roster Creation
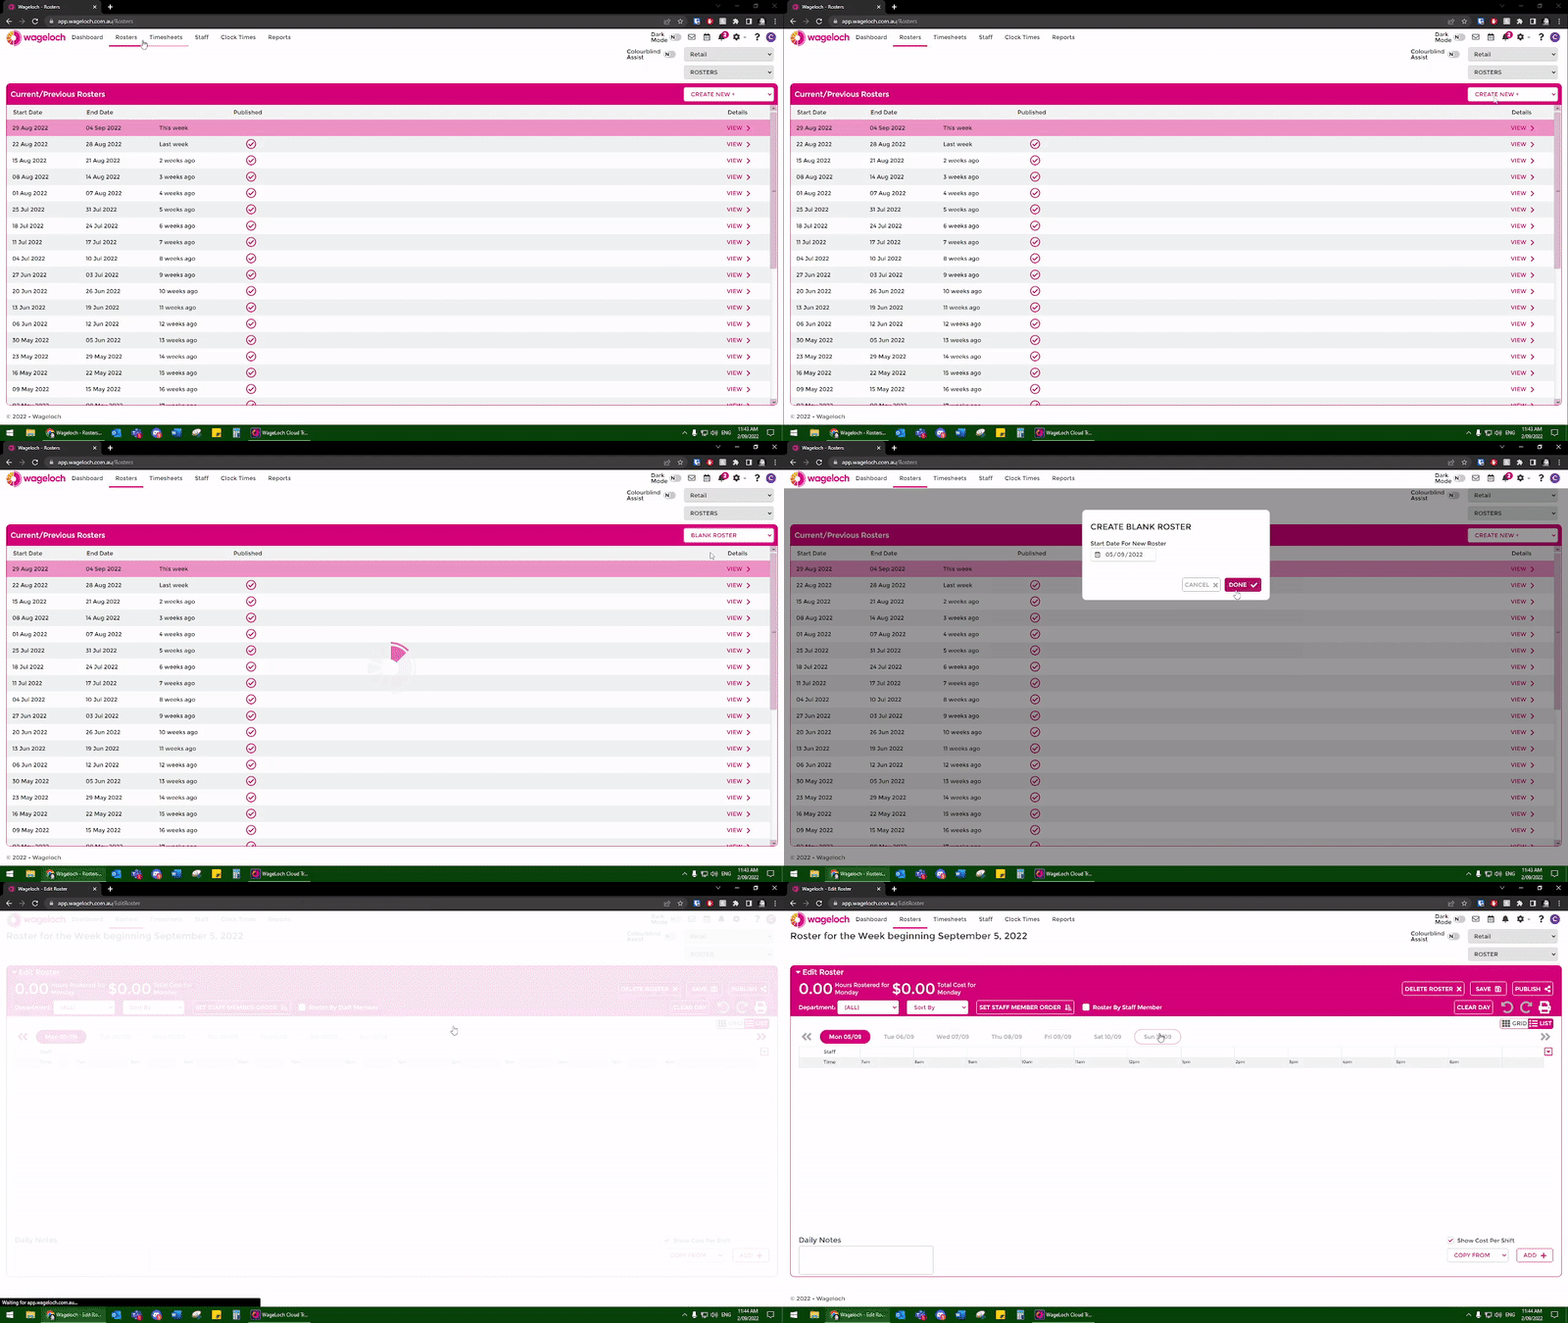
- Open Wageloch and sign in
- On the roster homescreen, click Create New+ and select Blank Roster
- The roster start date will align with your timesheet period and/or the end date of your previous roster.
- Click Done to create your roster.
- Once created, you will see your dates running left to right.
Adding in Shift Rows
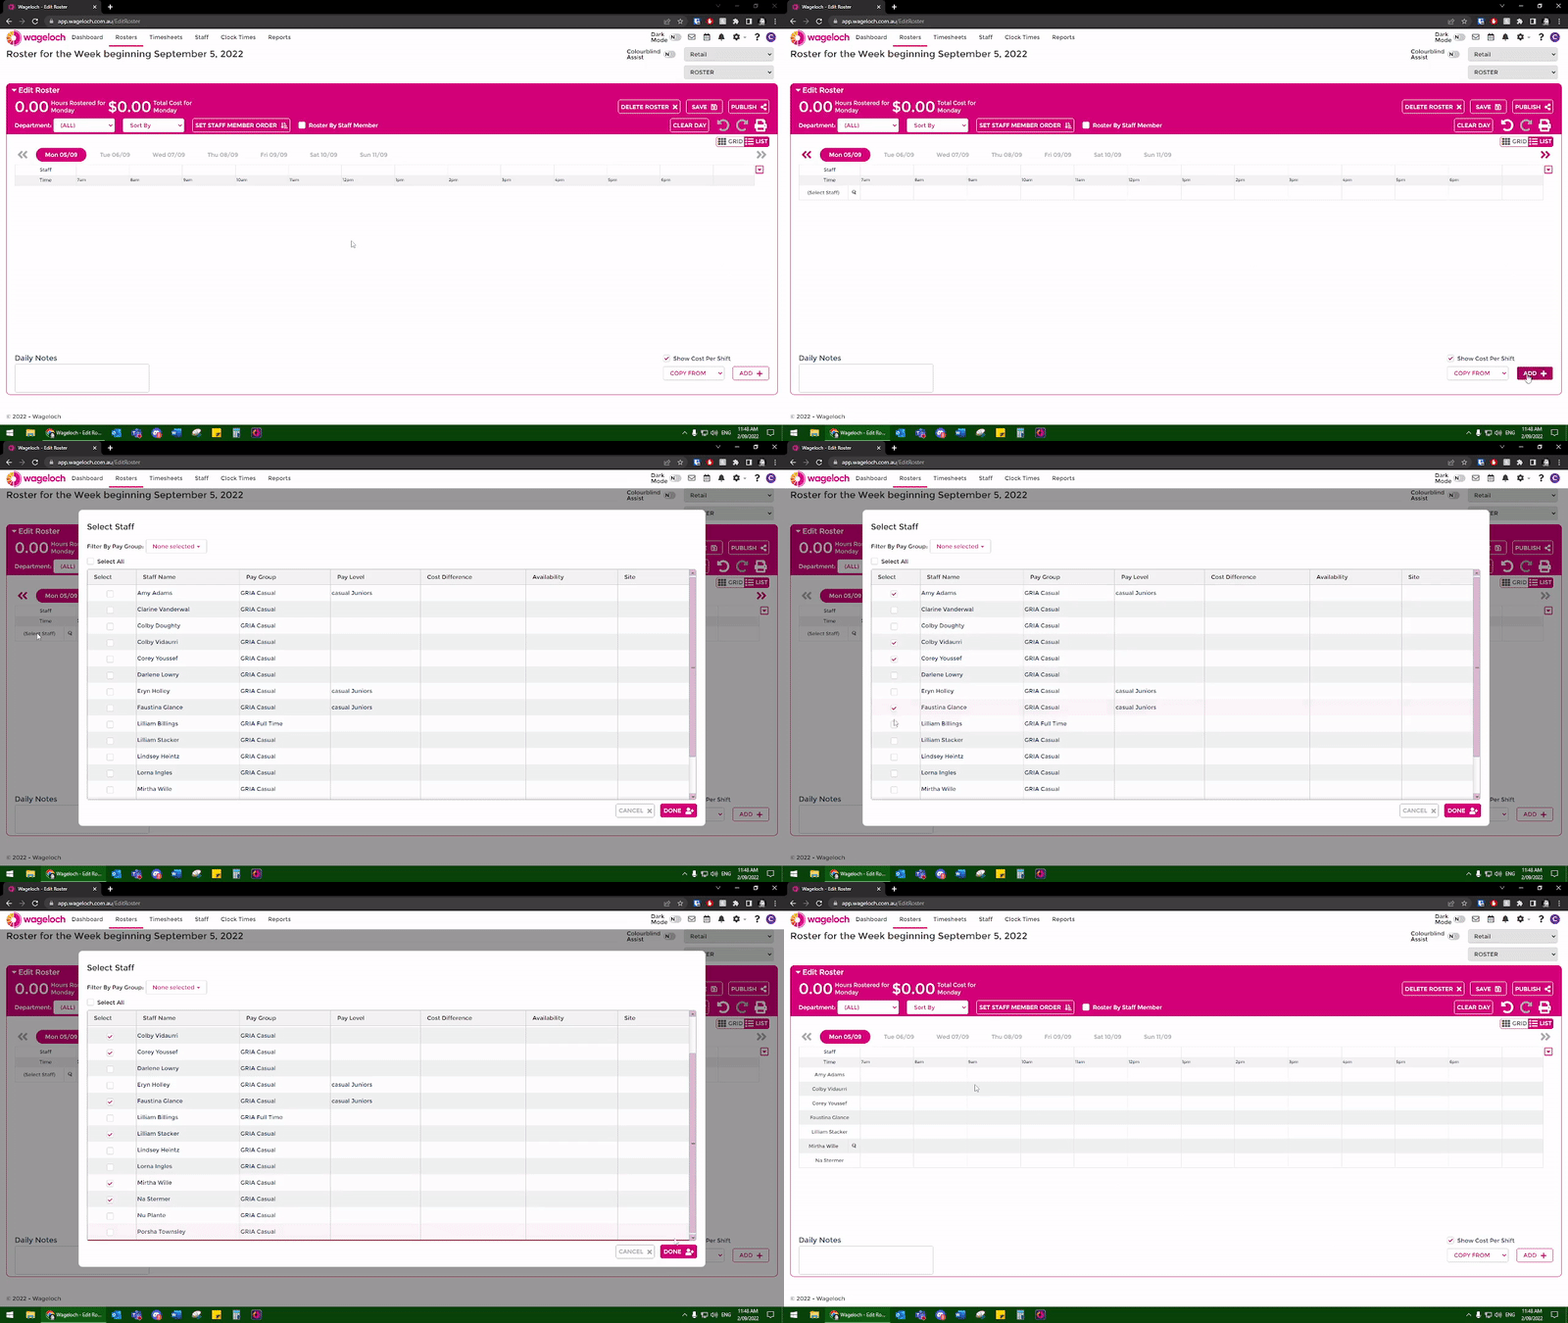
- To add in a shift row, click ADD+ in the bottom right.
- Click (Select Staff) to get a list of your employees.
- Tick the box next to whomever will be working this day.
- Once all selected, click Done; shift rows are now added in.
Adding in Shift Bars
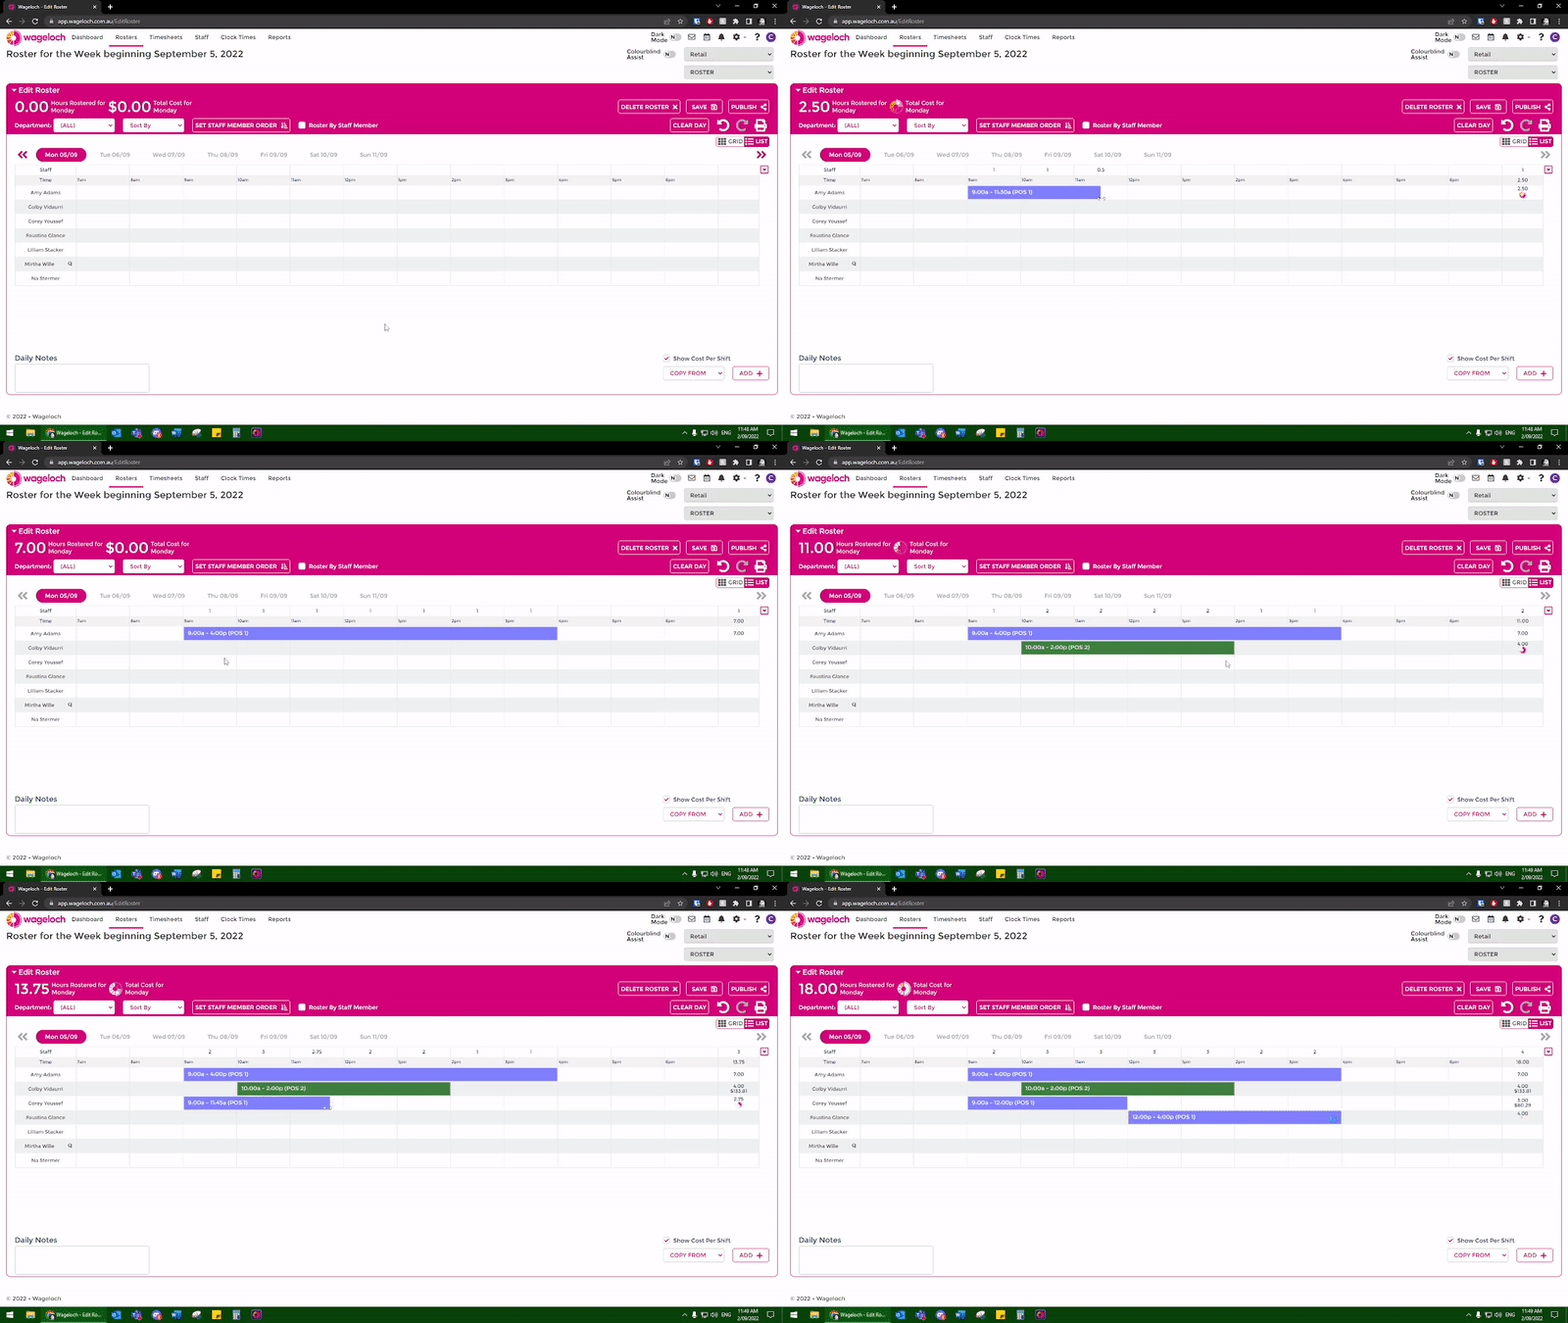
- On the shift row for the employee you've selected, find your start time.
- Left-click + hold, then drag across to the finish time.
- If you mis-click or get the start/finish time wrong, hover over the edges of the shift to show arrows.
- Left-click + hold, then drag to adjust the shift time.
- Complete this for each employee you have added on the day.
- Continue creating each day by following the steps listed above.
Reassigning Staff to Shifts (Shift Swap)
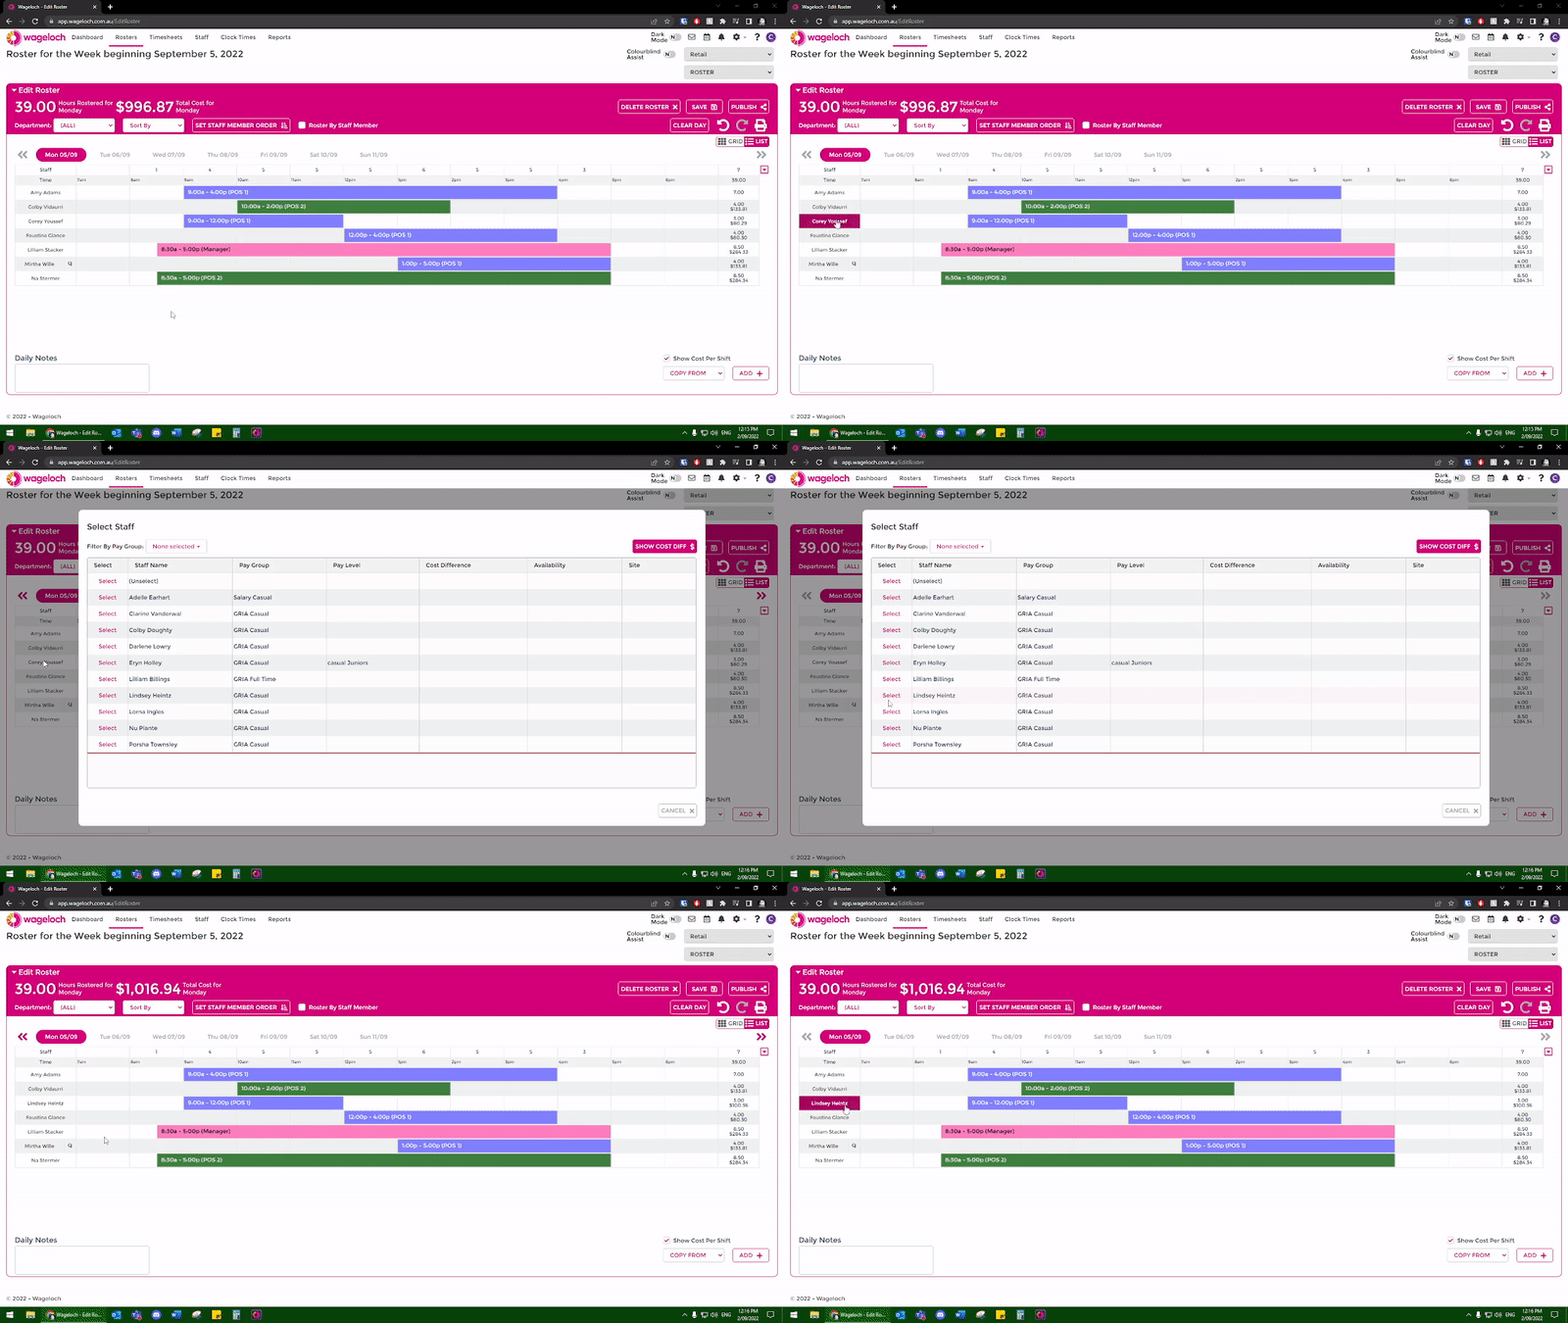
When a staff member needs to be swapped after being assigned a shift or if it was completed in error, we can reassign staff members to a shift.
This can be considered a shift swap.
- Left click on the employee's name for the shift you need to change.
- You'll receive a list of the staff available to take this shift.
- Click Select to pick that employee and reassign the shift.
Publishing
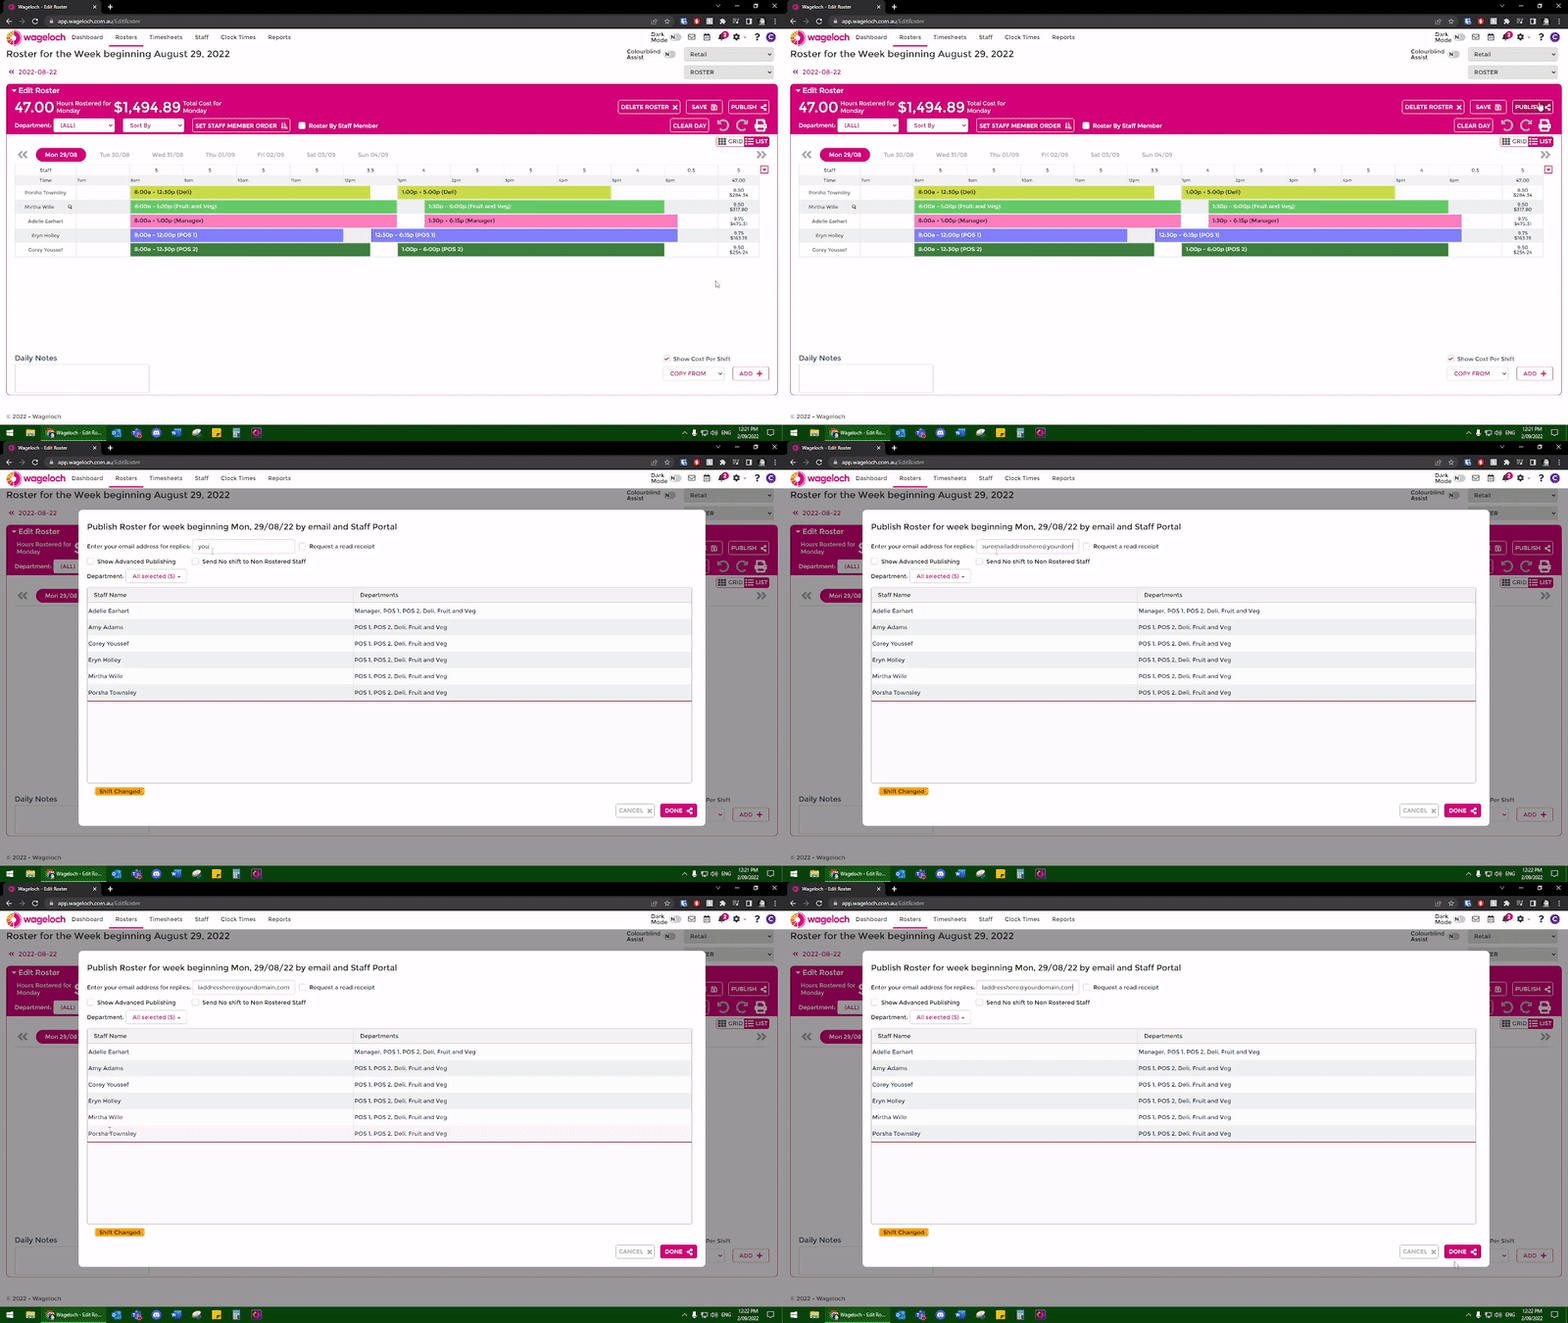
To notify your staff of their rosters, you're able to Publish by email and/or to the Wageloch Mobile App.
- After you have completed your roster, be sure to Save.
- Click on the Publish button in the top right.
- Enter your email address; should any staff have issues they can email you back.
- So long as the employees have a shift in the roster and an email address on their staff card, they will appear in the list.
- Click Done to send the rosters out to your staff!
