Difference between revisions of "Adding Manual Clock Times"
| Line 48: | Line 48: | ||
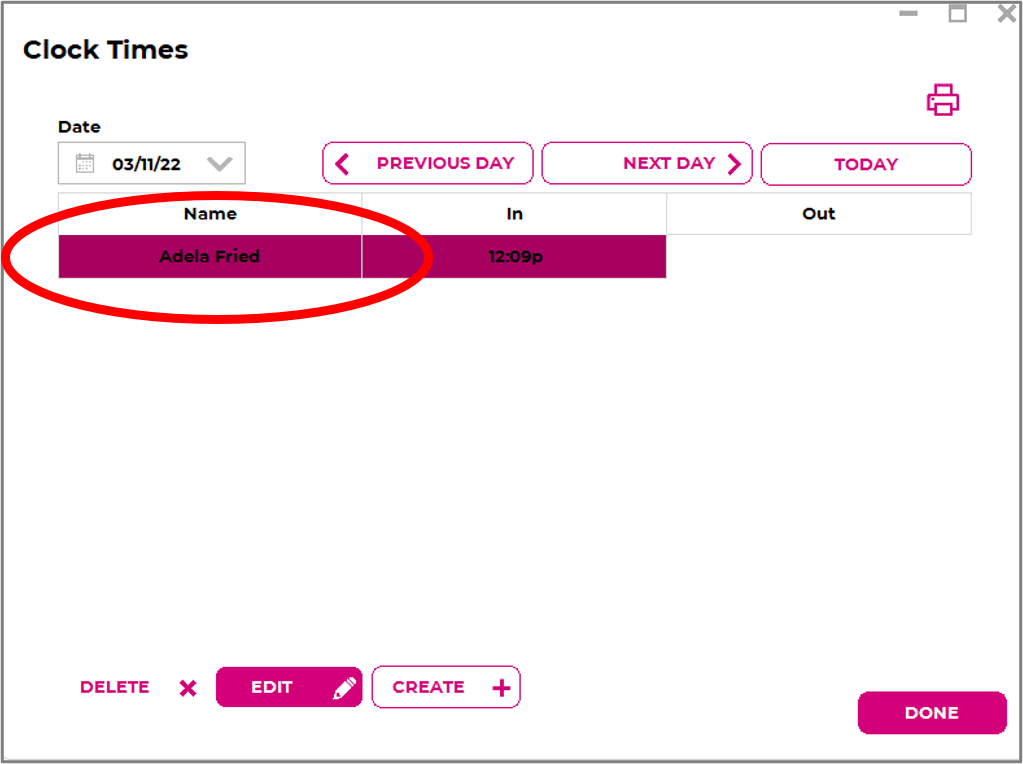
* Select the Clock Times button in the top right. | * Select the Clock Times button in the top right. | ||
* You'll be prompted to log in as an administrator - sign in. | * You'll be prompted to log in as an administrator - sign in. | ||
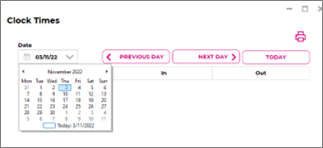
* | * Under Date, use the drop menu to select the date you wish to enter the clock time for, or use the Previous/Next/Today buttons. | ||
* You'll see a list of staff who have clock times for the day in question - | <br> | ||
[[File:1.2 Clock Times.png]] | |||
<br> | |||
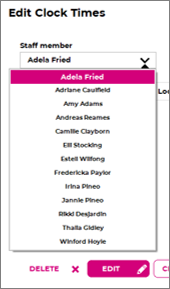
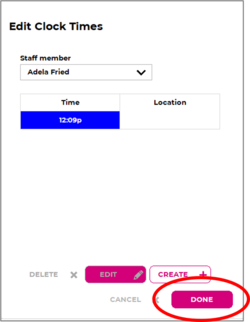
* You'll see a list of staff who have clock times for the day in question - select their name and click Edit. | |||
<br> | |||
[[File:1.2 Edit to Open.png]] | |||
<br> | |||
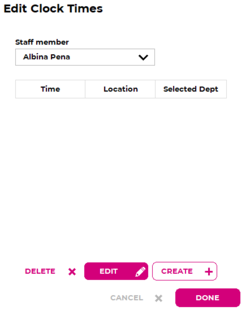
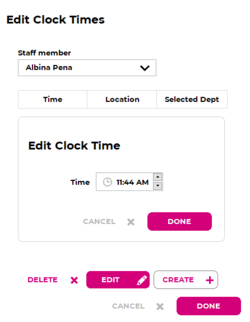
* Click Create, and pick time you wish to add their clock in or out flag. | |||
* By default, this will show as blue. | * By default, this will show as blue. | ||
* You can create as many clock in/out times as you need. | * You can create as many clock in/out times as you need. | ||
Revision as of 01:36, 7 February 2023
When staff have legitimately clocked in/out via your nominated method (fingerprint scanner, PIN, mobile app, etc.) you cannot edit or manipulate their clock times. You can however, add in manual clock times before, between and after the existing legitimate times.
Instances where manual clock times are used:
- Staff forget to clock in/out for their shift
- Recording accurate attendance for staff
- Staff clock in late, but were there on time.
Please note that if you are paying staff according to a roster, clock times being present in the system is not a requirement as it relies on a roster being present.
If you are paying according to clock times which requires staff to clock in/out to be paid, you may find manual clock times necessary to ensure your timesheets are completed correctly.
Please note that the more clock times you add for someone on a day - especially before/after/between legitimate times - can cause confusion with attendance records; if you're not sure what's required, please contact the Wageloch Helpdesk for assistance.
Time Kiosk (tablet, computer, web)
New Manual Times
- Head to your clocking tablet on computer with Time Kiosk installed.
- Select the Clock Times button in the top right.
- You'll be prompted to log in as an administrator - sign in.
- Pick the day - you're able to add in times for today, yesterday or a week ago.
- Click Create at the bottom of the window.
- Select the employee from the list of staff available.
- Click Create, and pick time you wish to add their clock in or out flag.
- By default, this will show as blue.
- You can create as many clock in/out times as you need.
- Select Done to save.
- These times will now be visible in your timesheet and all reports.
Adding new times to existing clock times
- Head to your clocking tablet on computer with Time Kiosk installed.
- Select the Clock Times button in the top right.
- You'll be prompted to log in as an administrator - sign in.
- Under Date, use the drop menu to select the date you wish to enter the clock time for, or use the Previous/Next/Today buttons.
- You'll see a list of staff who have clock times for the day in question - select their name and click Edit.
- Click Create, and pick time you wish to add their clock in or out flag.
- By default, this will show as blue.
- You can create as many clock in/out times as you need.
- NOTE: The more times you add before, during or after will affect any existing clock times and whether they are in/out logs.
- Select Done to save.
- These times will now be visible in your timesheet and all reports.
Manual Times via Roster >> Clock Times
When you log into the desktop or web-based version of Wageloch, you may see a menu option between Staff and Reports in the top row for Clock Times.
You can complete the exact steps as above, with no requirement to log into Time Kiosk.

