Difference between revisions of "Departments"
From Wageloch Wiki
| (3 intermediate revisions by the same user not shown) | |||
| Line 9: | Line 9: | ||
* Useful for running reports based on departments for specific wage costings.<Br> | * Useful for running reports based on departments for specific wage costings.<Br> | ||
=Enabling Departments= | =Enabling, Creating, Assigning Departments= | ||
* Click on Settings in the top right corner | * Click on Settings in the top right corner | ||
| Line 15: | Line 15: | ||
* Enable the <b>Use Departments</b> function. | * Enable the <b>Use Departments</b> function. | ||
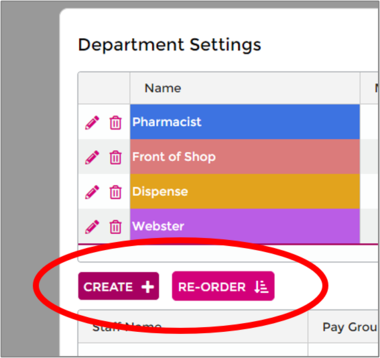
[[File:3.0 Click on Create +.png|380px]] | |||
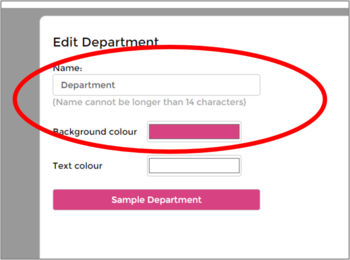
* Use the <b>Create<b> button to add your departments; give them a name and a color. | * Use the <b>Create</b> button to add your departments; give them a name and a color. | ||
* Click Done to create the department. | * Click Done to create the department. | ||
* Repeat this as many times as you wish. | * Repeat this as many times as you wish. | ||
[[File:3.0 Click on Name and Colour.png|350px]] | |||
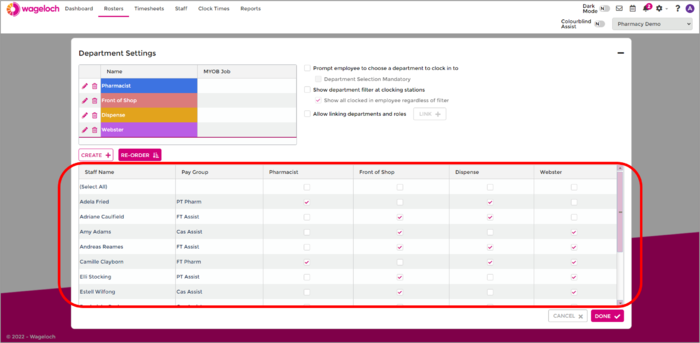
* Once you've created all the departments you need, you'll see tick boxes next to your staff list. | * Once you've created all the departments you need, you'll see tick boxes next to your staff list. | ||
| Line 24: | Line 27: | ||
* Done to save. | * Done to save. | ||
<br><br> | <br><br> | ||
[[File:3.0 Tick Multiple Areas.png|700px]] | |||
<br><br> | |||
<br> | |||
<br> | |||
Latest revision as of 23:54, 3 March 2024
Why use Departments?
Departments are an optional tool in Wageloch that can assist with your rosters, timesheets and reports. We also have the ability to restrict certain administrative users in Wageloch to see specific departments; great for line managers to assist with rostering and timesheets.
There are a lot of different reasons why departments can be useful for you:
- Able to ensure correct staff count and shift coverage.
- Better shift allocation for effective roster forecasting
- Staff will know where in the company they'll be working each shift.
- Ability to run reports and filter by specific departments
- Useful for running reports based on departments for specific wage costings.
Enabling, Creating, Assigning Departments
- Click on Settings in the top right corner
- Select Departments from the menu
- Enable the Use Departments function.
- Use the Create button to add your departments; give them a name and a color.
- Click Done to create the department.
- Repeat this as many times as you wish.
- Once you've created all the departments you need, you'll see tick boxes next to your staff list.
- Tick as many as you like for each employee; this will allow you to reassign staff between departments.
- Done to save.


