Difference between revisions of "Timesheets by Department"
| Line 15: | Line 15: | ||
* Once your timesheet has loaded, there will be a department filter in the top right corner. | * Once your timesheet has loaded, there will be a department filter in the top right corner. | ||
* Use this to cycle between each department to finalize your timesheet days. | * Use this to cycle between each department to finalize your timesheet days. | ||
<b>TIP:</b> If you'd like to see all departments rather than one at a time, go into Settings >> Rosters >> Other >> Enable selecting multiple departments | |||
[[File:Timesheet-by-dept.png|1000px|center]] | |||
=Pre-Submit Filter= | =Pre-Submit Filter= | ||
Revision as of 02:26, 30 May 2023
Sometimes when our implementation managers or trainers evaluate the needs of your business, one way to simplify things is to configure Departments.
This can help you roster effectively, and speed up the timesheet process by having department managers finalize their own timesheets (see Users & Security about department restrictions).
In this article we'll be covering how to finalize timesheets by department and how to view/filter your pre-submit screen for better visibility of the hours being sent to payroll for processing.
Timesheets by Department
In Wageloch there is an option to finalize timesheets by department. This is especially useful if you have a large team that is overseen by department managers, and you would like those managers to only view, check and finalize hours in the timesheet for those particular staff.
While there can be a few full administrative users in Wageloch that can see and do everything for all staff and teams, department restrictions can be enabled in the Security area to limit visibility for specific users.
If you would like to enable the ability to finalize your timesheets by department, please contact Helpdesk to have this turned on!
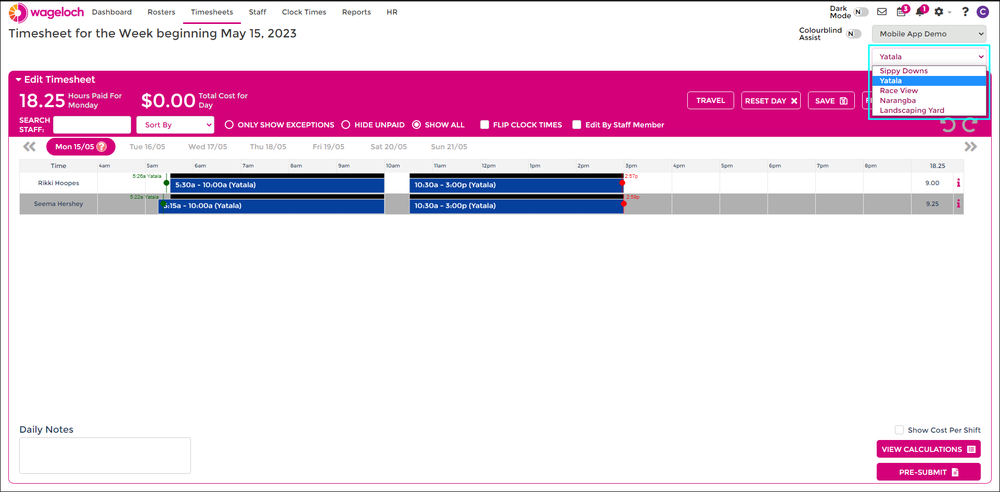
- Select Timesheets from the top menu and view your current timesheet.
- Once your timesheet has loaded, there will be a department filter in the top right corner.
- Use this to cycle between each department to finalize your timesheet days.
TIP: If you'd like to see all departments rather than one at a time, go into Settings >> Rosters >> Other >> Enable selecting multiple departments
Pre-Submit Filter
Previously when viewing the Pre-Submit summary report before exporting to payroll, you would see all of your staff in a single report with the breakdown of their hours.
We've now updated this to allow department filtering; department managers are also able to see the summary without needing to export, and also view the totals for all staff across all departments.
- Open your current timesheet.
- Finalize your timesheet days as normal and click Pre-Submit.
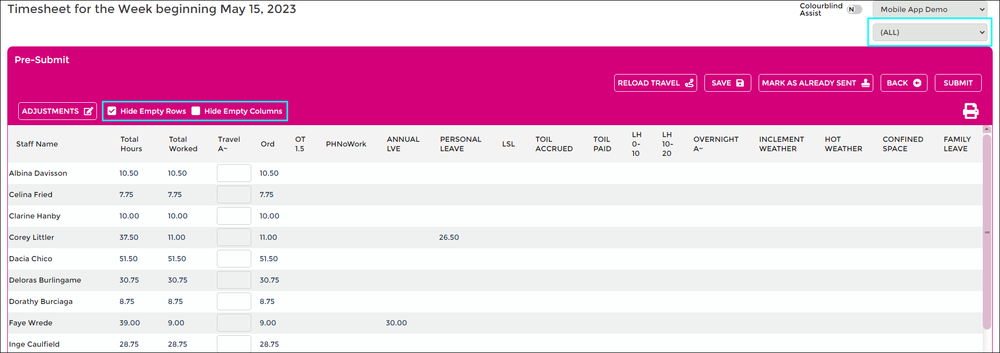
- On the Pre-Submit summary screen, initially all staff across all departments will appear.
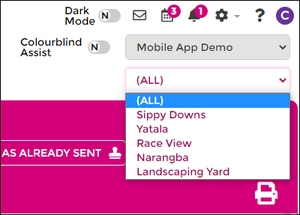
- In the top right drop menu where it currently says (ALL) you can select individual departments to see the summaries for.
TIP: Use the Hide Empty Rows and Hide Empty Columns options to remove unpaid staff and unused timesheet columns and simplify your timesheet summary.


