Difference between revisions of "Mobile Clocking"
| (5 intermediate revisions by the same user not shown) | |||
| Line 23: | Line 23: | ||
** Selecting any Departments or Roles to specify what you've done during your shift. | ** Selecting any Departments or Roles to specify what you've done during your shift. | ||
* If you've clocked out successfully, you'll receive a prompt saying Clocked Out successfully. | * If you've clocked out successfully, you'll receive a prompt saying Clocked Out successfully. | ||
<br> | |||
[[File: 2.0 Tap Clock Out.PNG|250px]] [[File: 2.0 Clock Out with Notes.PNG|230px]] | |||
==Logging Manual Times== | ==Logging Manual Times== | ||
| Line 35: | Line 37: | ||
* Enter any notes or information your employer may need. | * Enter any notes or information your employer may need. | ||
* Press Send to log your manual time. | * Press Send to log your manual time. | ||
<br> | |||
[[File: 3.0 Tap Manual Input.PNG|250px]] [[File: 3.0 Select Clock In or Out.png|250px]] [[File: 3.0 Correct Date and Time.png|250px]] [[File: 3.0 Send.png|217px]] | |||
==Running Clocking Reports== | ==Running Clocking Reports== | ||
| Line 44: | Line 48: | ||
* When displayed, you will see the day/date, clock in and out times and a total amount of hours. | * When displayed, you will see the day/date, clock in and out times and a total amount of hours. | ||
* You can then close the app or go back to run another report. | * You can then close the app or go back to run another report. | ||
<br> | |||
[[File: 4.0 Menu and Clock Times.PNG|600px]] [[File: 4.0 Date Range.PNG|287px]] [[File: 4.0 Day Date & Clock.png|260px]] | |||
=Logging Odometer Readings for Travel= | |||
[[File: 5.0 Image 1.png|300px|thumb|right]] | |||
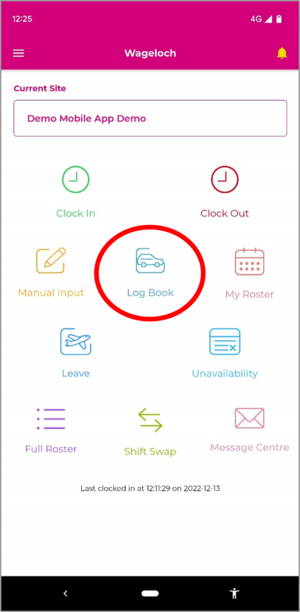
If your manager has enabled Travel Logs, you will have an option on your Wageloch Mobile App home screen for Log Book. | |||
This allows you to easily record your odometer readings and send them directly to your manager for processing in your timesheet. | |||
==Start Trip== | |||
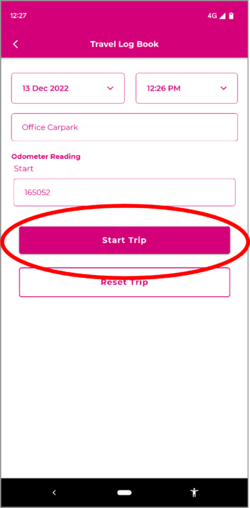
* Tap Log Book. | |||
* Your Date and Time will appear automatically. | |||
* Enter the name of the location your trip is starting at. | |||
* Enter your odometer reading value. | |||
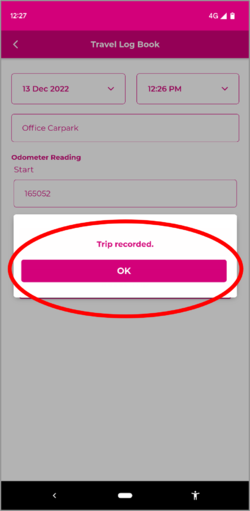
* Press Start Trip to commence your log. | |||
<br> | |||
[[File: 5.0 Image 2.png|250px]] [[File: 5.0 Image 3.png|250px]] | |||
==Stop Trip== | |||
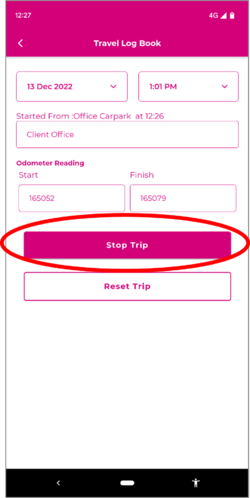
* Tap Log Book | |||
* Your Date and Time will appear automatically. | |||
* Enter the name of the location your trip is ending at. | |||
* Enter your odometer reading value. | |||
* Press Stop Trip to complete your log. | |||
<br> | |||
[[File: 5.0 Image 4.png|250px]] [[File: 5.0 Image 5.png|250px]] | |||
<br> | |||
<br> | |||
<br> | |||
<b>[[Main Page | < Back]]</b> | |||
Latest revision as of 02:29, 17 February 2023
Mobile clocking through the Wageloch Mobile app is a fantastic tool for staff who may work remotely, be on the move constantly, or simply an effective way to log clock times rather than needing to implement additional hardware like a computer or tablet. It relies on staff to have a smart phone (Apple, Android) and Location Services enabled to ping GPS coordinates when logging times.
If you're wanting to find out how to set up Mobile Clocking for your staff, please head over to Setting up Mobile Clocking to find out more.
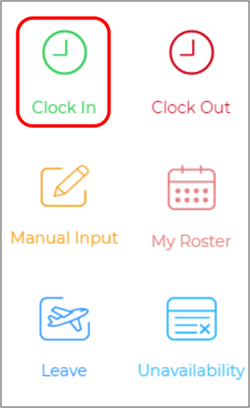
Clocking In
- Open Wageloch Mobile App.
- Tap Clock In
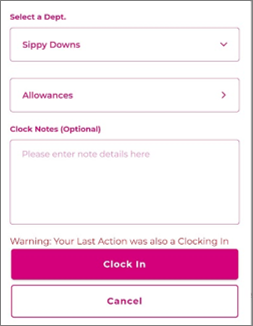
- Depending on the configuration, you could be prompted a few different ways:
- Simply press the Clock In button to clock in.
- Clock Notes (Optional): enter any information for your manager to see before pressing Clock In.
- Selecting any Departments or Roles to specify what you're doing on your shift.
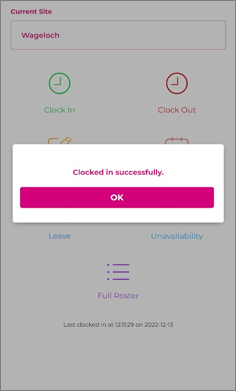
- If you've clocked in successfully, you'll receive a prompt saying Clocked in successfully.
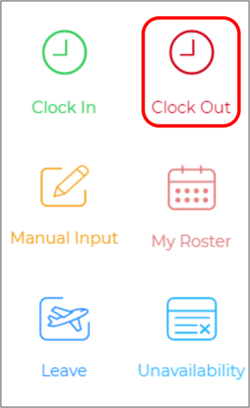
Clocking Out
- Open Wageloch Mobile App.
- Tap Clock Out
- Depending on the configuration, you could be prompted a few different ways:
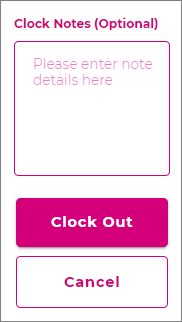
- Simply press the Clock Out button to clock out.
- Clock Notes (Optional): enter any information for your manager to see before pressing Clock Out.
- Selecting any Departments or Roles to specify what you've done during your shift.
- If you've clocked out successfully, you'll receive a prompt saying Clocked Out successfully.
Logging Manual Times
Manual times are enabled/disabled as per the business manager's request when configuring the Wageloch Mobile App for clocking.
This tool is primarily used if a staff member is out of signal (data, wifi, GPS, all of the above) or backdating their clock times if they've forgotten to clock in/out for shifts.
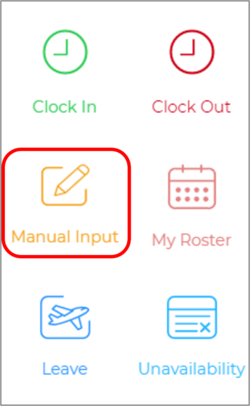
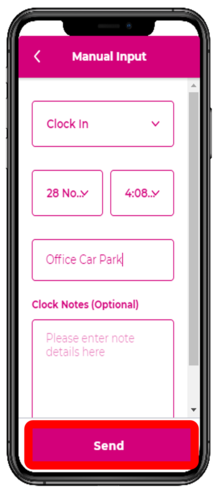
- Open Wageloch Mobile App.
- Tap Manual Input.
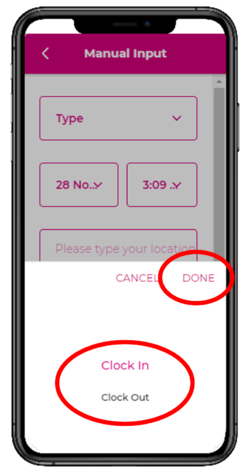
- Select whether this will be a Clock In or Clock Out time from the first drop menu.
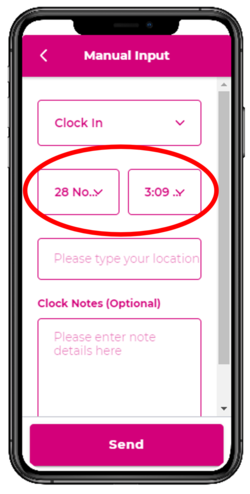
- Pick the correct date and time the clock time is to be logged for.
- Enter your locations at the time of clocking (i.e. office carpark, Job 3562, etc.)
- Enter any notes or information your employer may need.
- Press Send to log your manual time.
Running Clocking Reports
Employees are able to run their own clock times reports to show when they have been logging times throughout a time period.
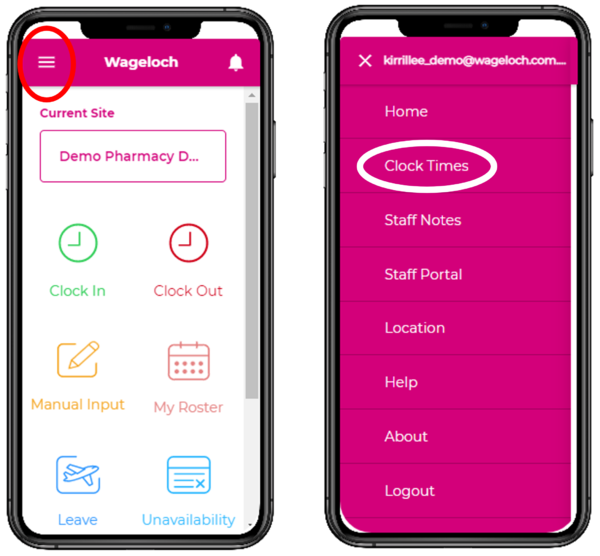
- Open Wageloch Mobile App.
- Tap the Menu in the top left corner (three horizontal lines) and select Clock Times.
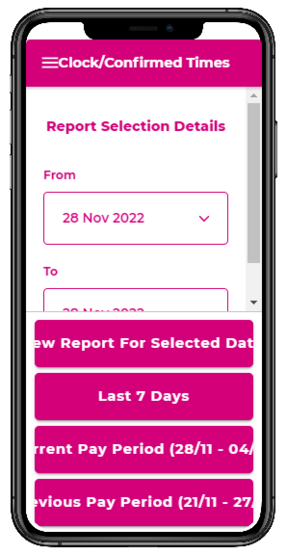
- You can opt to pick a date range, the last 7 days, current pay period or last pay period.
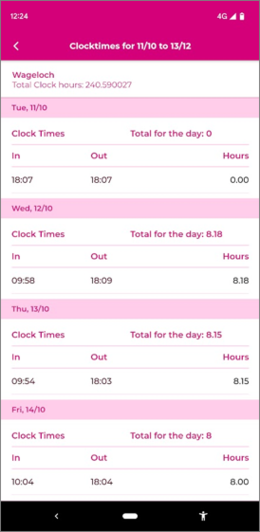
- When displayed, you will see the day/date, clock in and out times and a total amount of hours.
- You can then close the app or go back to run another report.
Logging Odometer Readings for Travel
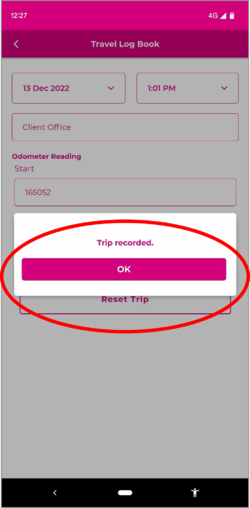
If your manager has enabled Travel Logs, you will have an option on your Wageloch Mobile App home screen for Log Book. This allows you to easily record your odometer readings and send them directly to your manager for processing in your timesheet.
Start Trip
- Tap Log Book.
- Your Date and Time will appear automatically.
- Enter the name of the location your trip is starting at.
- Enter your odometer reading value.
- Press Start Trip to commence your log.
Stop Trip
- Tap Log Book
- Your Date and Time will appear automatically.
- Enter the name of the location your trip is ending at.
- Enter your odometer reading value.
- Press Stop Trip to complete your log.
